How to Install and Use LUTs | DaVinci Resolve, Premiere Pro, Final Cut Pro
1.What Is a LUT?
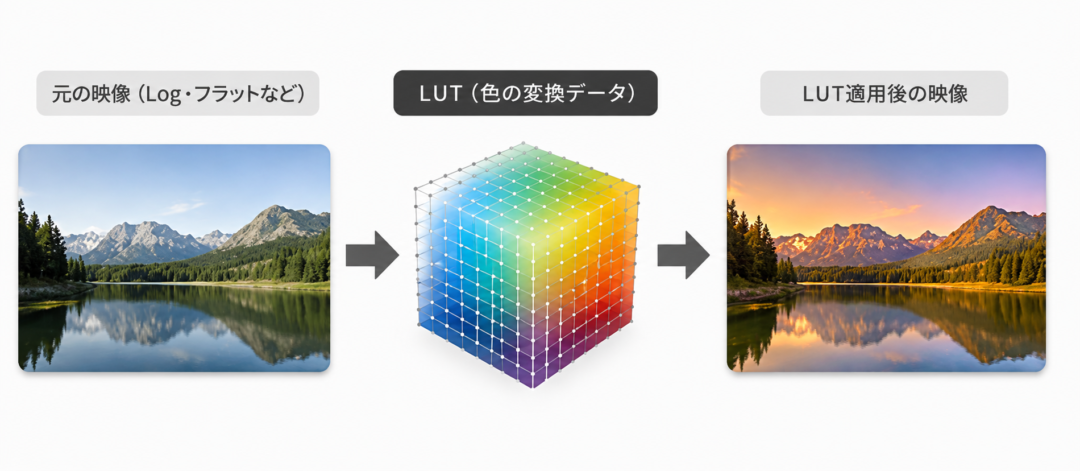
For example, you can bring Log footage back to natural color, cool it down for a clearer feel, make an evening scene more striking, or move it toward the restrained tones of film.
What makes changing that mood of your footage so easy is a LUT.
2. Download a LUT
Visual Park offers LUTs for a wide range of cameras.
Besides LUTs for Log footage, many also work on footage shot with a standard picture profile.
The steps for applying them are essentially the same.
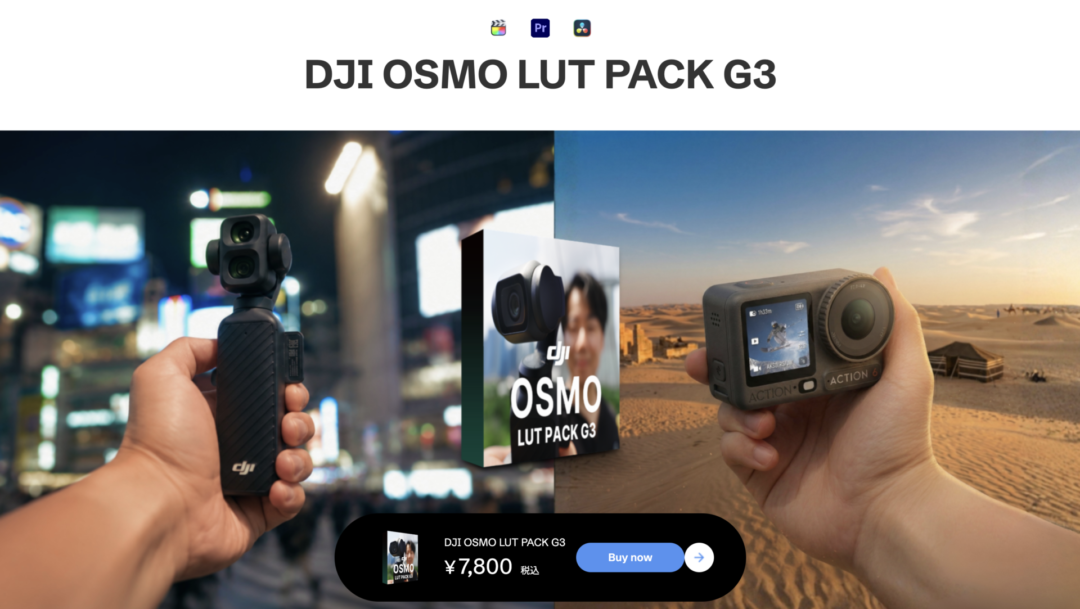
(Here we’ll use DJI OSMO LUT PACK G3, which works with the Osmo Pocket series and other cameras, as our example.)
3. Using LUTs in DaVinci Resolve
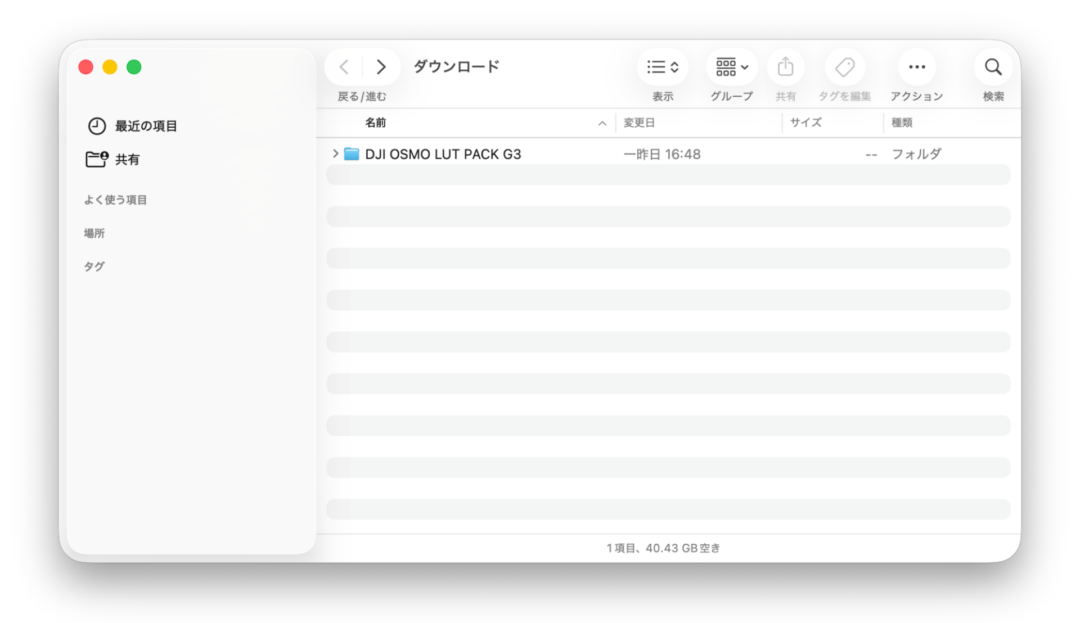
① Download the LUT from Visual Park
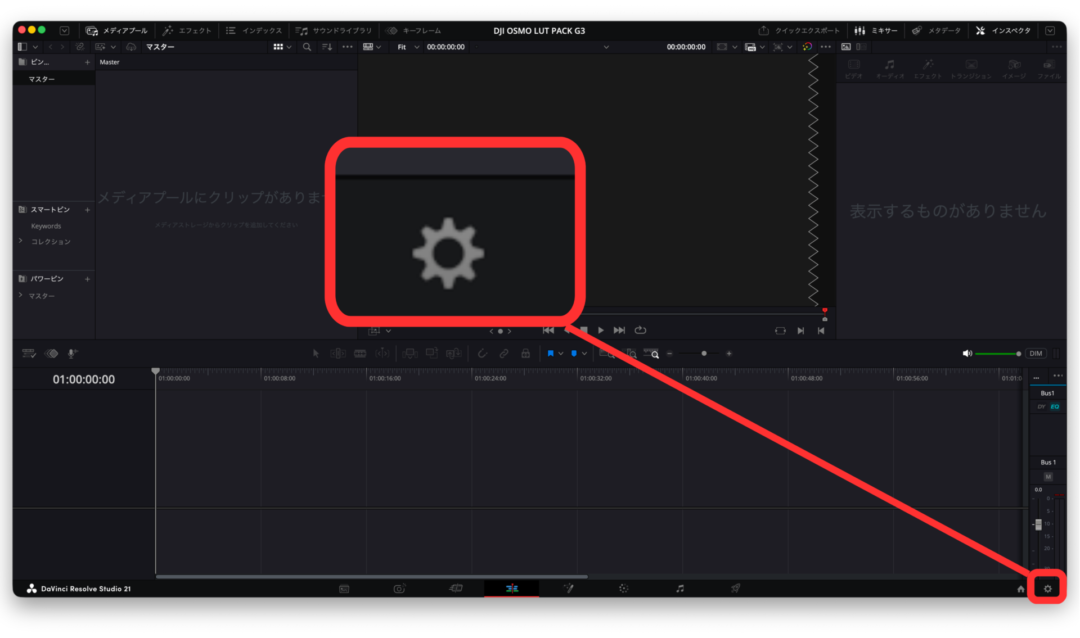
② Click the gear icon at the bottom right of the project window
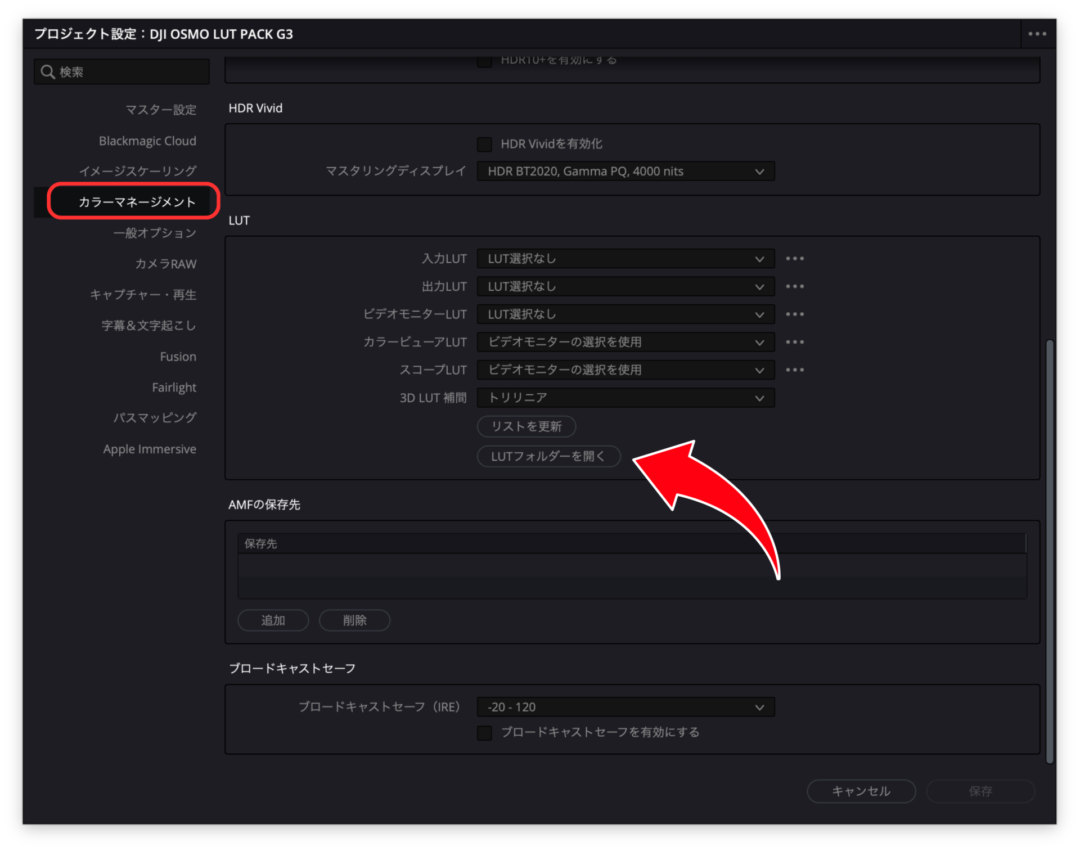
③ Under “Color Management”, click “Open LUT Folder”
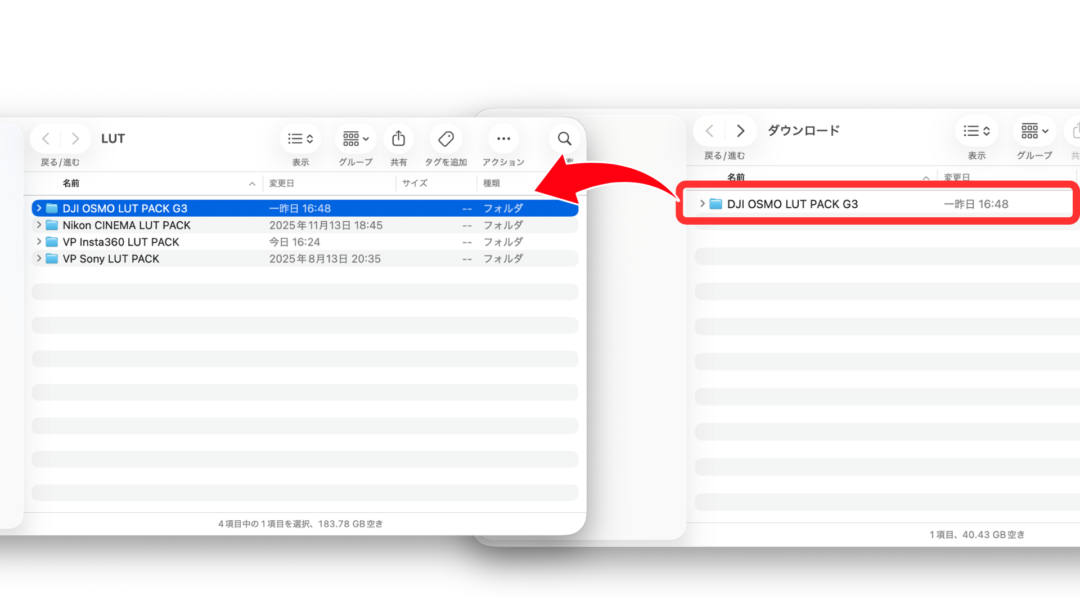
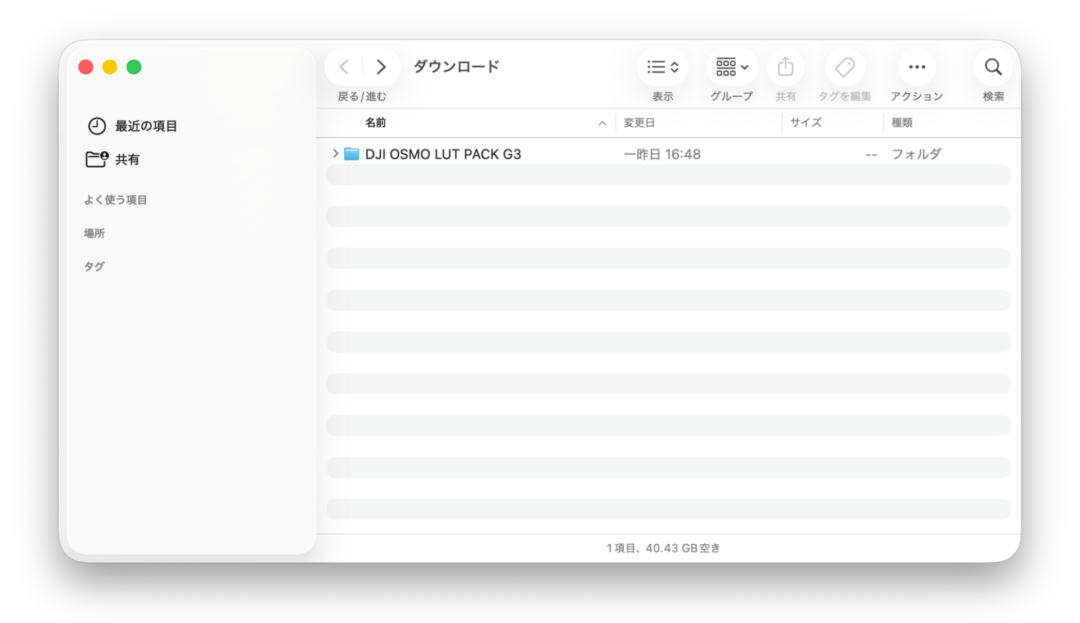
④ Copy the folder you downloaded in ① into the “LUT” folder that opens
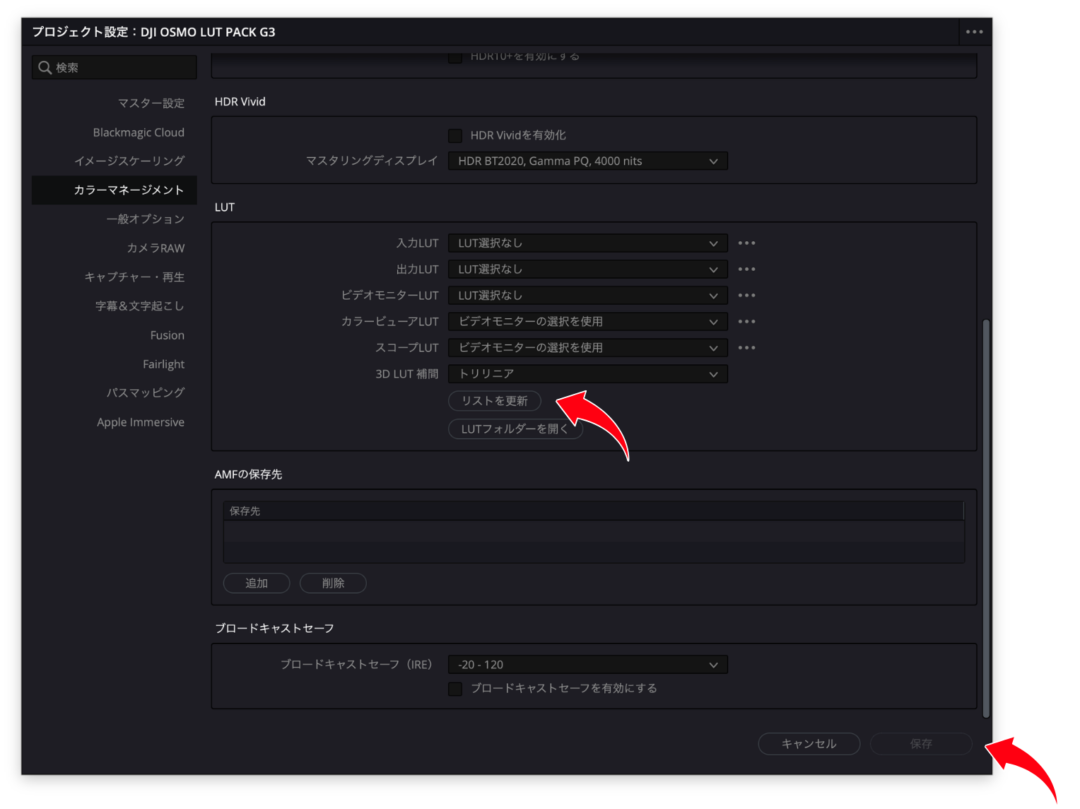
⑤ Click “Update Lists”, then “Save” at the bottom right to finish importing
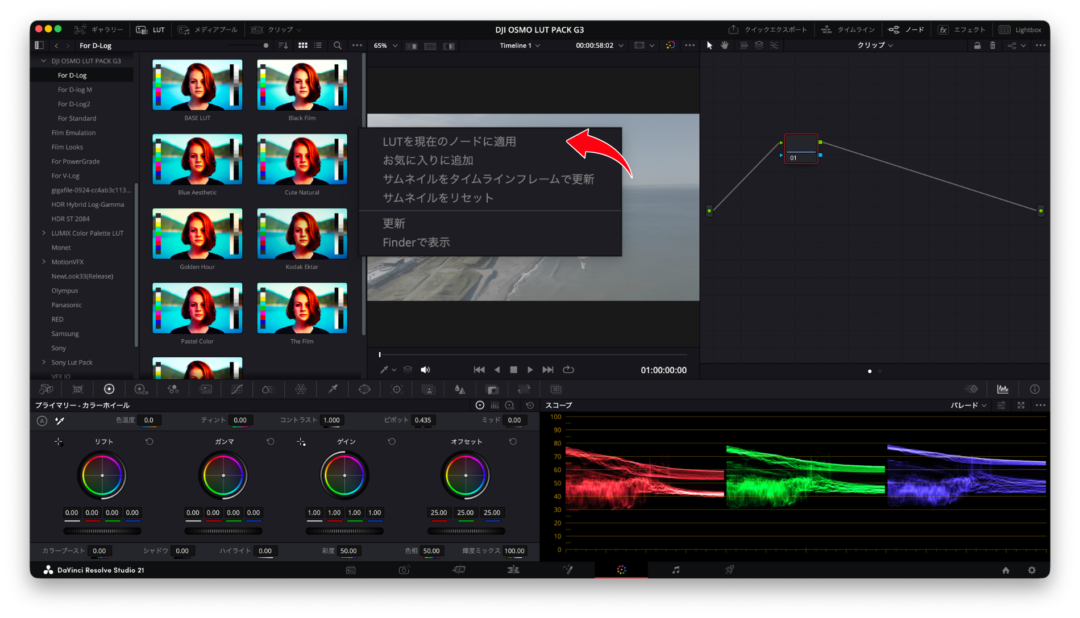
⑥ Go to the Color page and open “LUT” at the top left
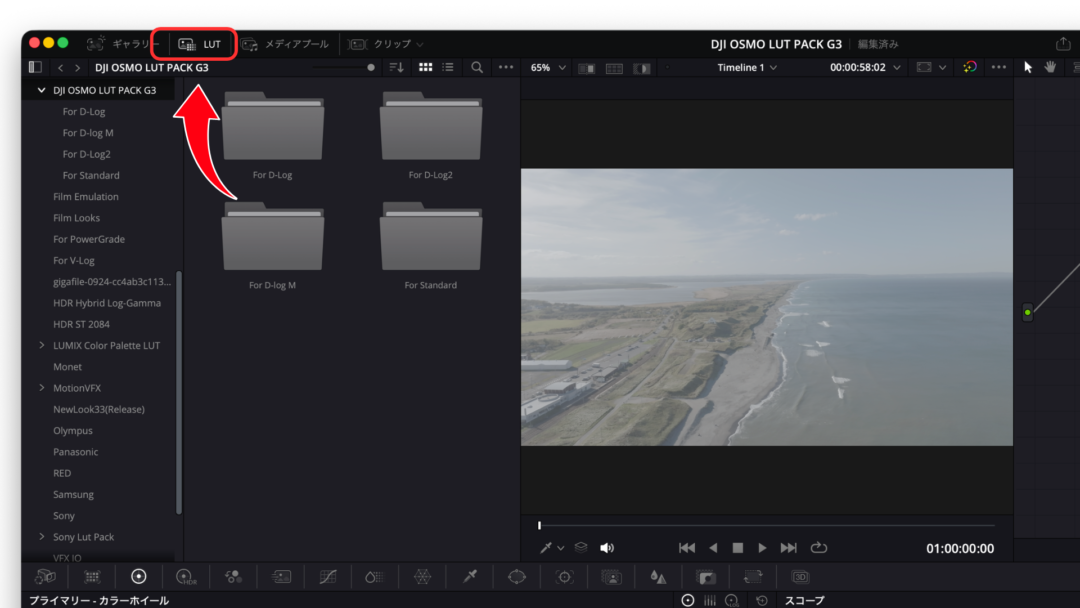
⑦ Right-click the LUT and choose “Apply LUT to Current Node”
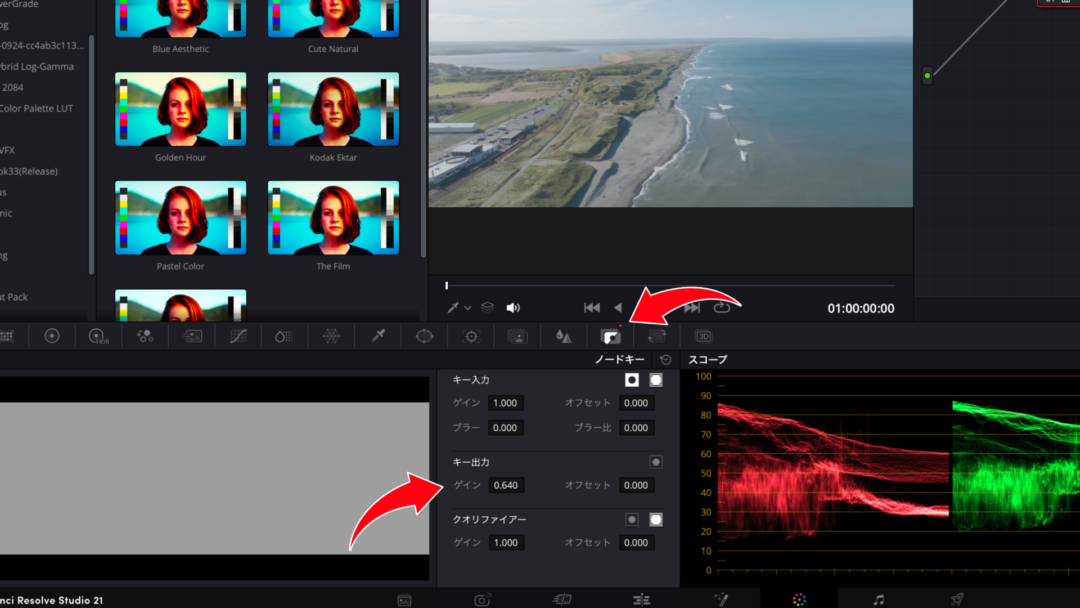
⑧ If needed, adjust the LUT amount under “Key Output”
4. Premiere Pro
① Download the LUT from Visual Park
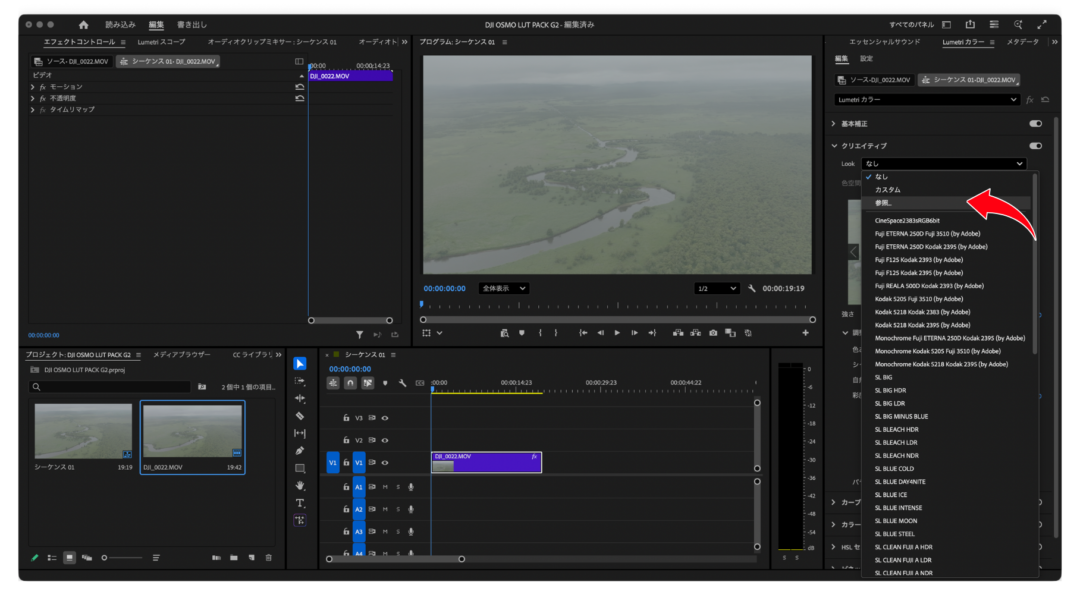
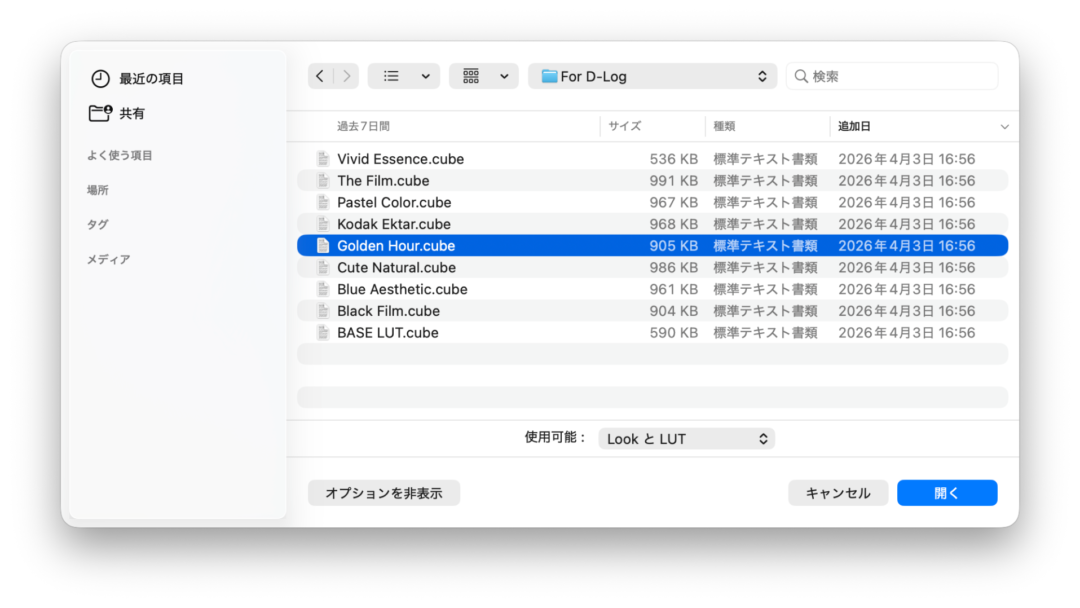
② In Lumetri Color → Creative, click “Look” → “Browse”
③ Open the LUT you want from the folder you downloaded
5. Final Cut Pro
① Download the LUT from Visual Park
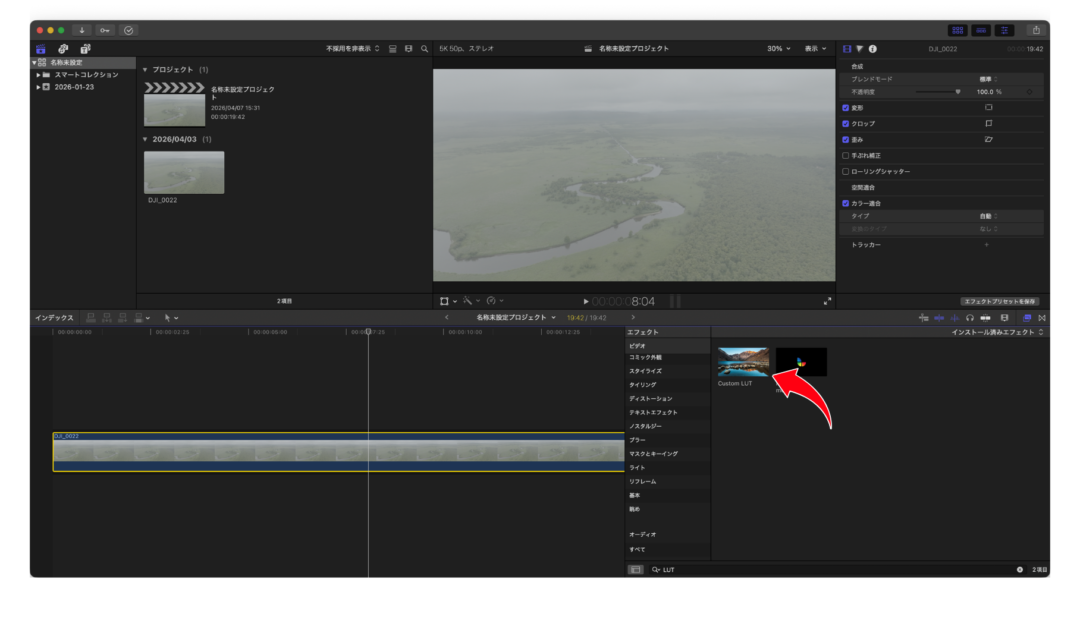
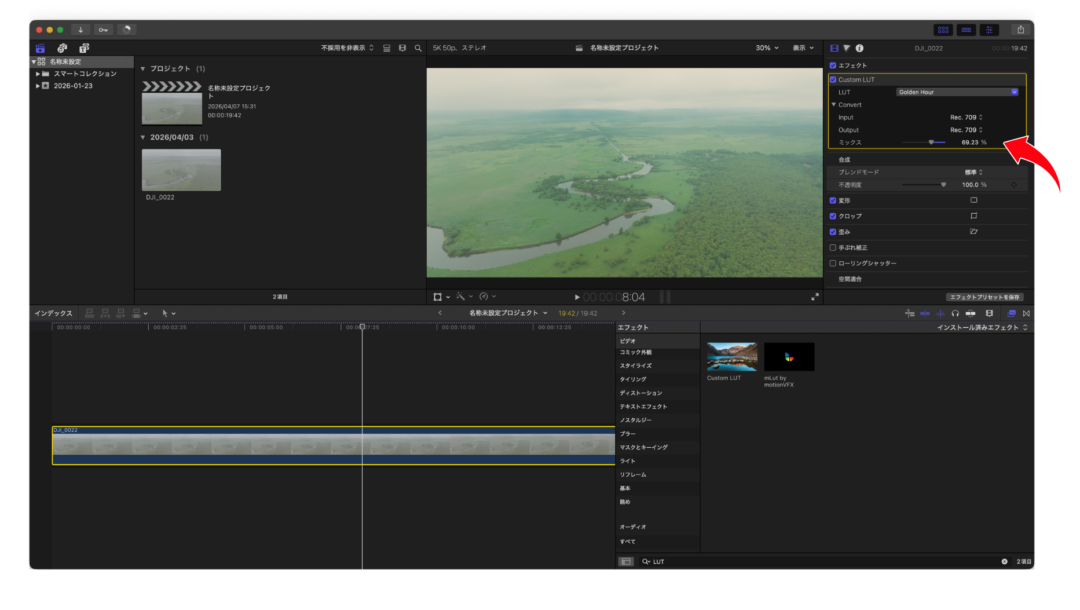
② Select “Custom LUT” from Effects
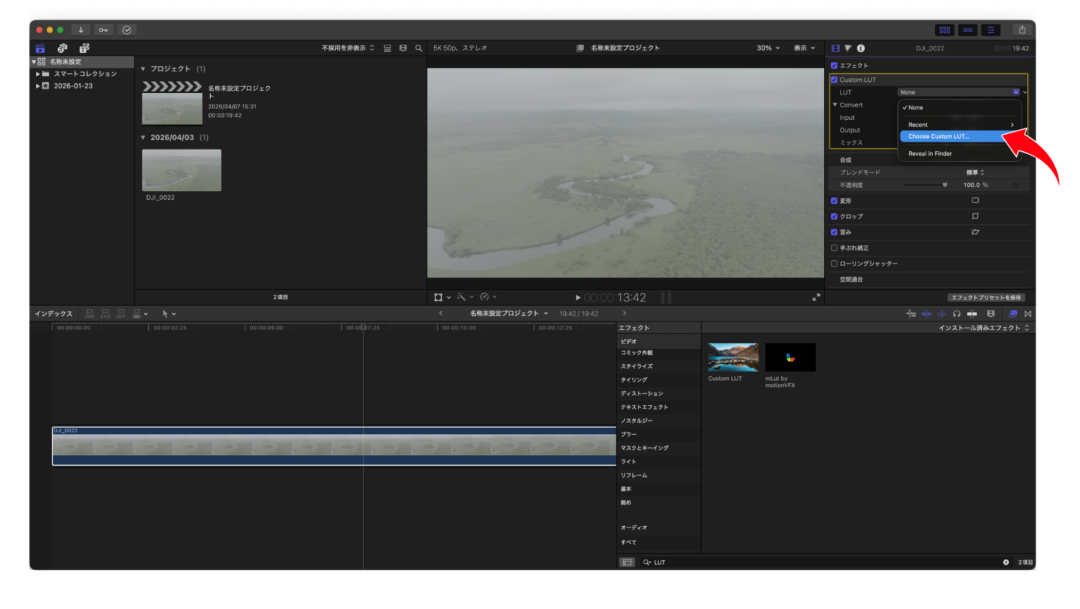
③ Under Custom LUT at the top right, click “Choose Custom LUT”
④ Open the LUT you want from the folder you downloaded
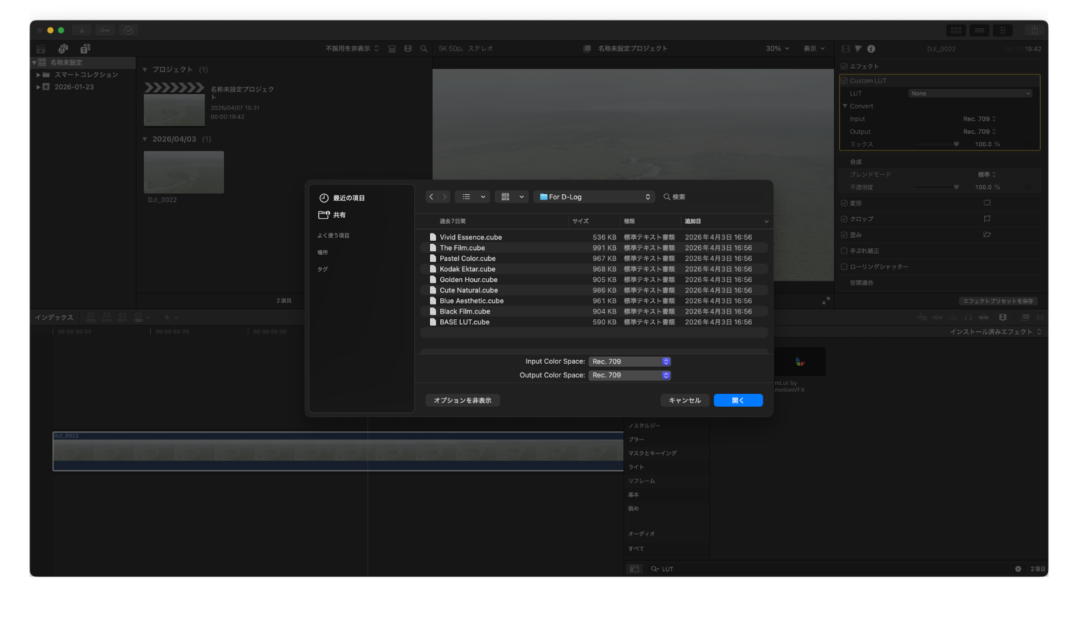
⑤ Adjust the LUT amount as needed
That covers the basics of applying LUTs in each editing app.
Simply adjusting how much of the LUT is applied already changes the feel of your footage a great deal.
Try them on your own footage and find the look you like.