Apple Log LUT PACK G2 Installation Guide | Blackmagic Camera App and Other Editing Software
This guide explains how to load the LUTs in Visual Park’s «Apple Log LUT PACK G2 » into the
Blackmagic Camera app and other editing software, and how to apply them.
Installation of “Apple ProRAW Preset Pack” for Lightroom is covered in a separate guide.
[Apple ProRAW Preset Pack Installation | Lightroom and Lightroom Classic]
1. Installing in the Blackmagic Camera App
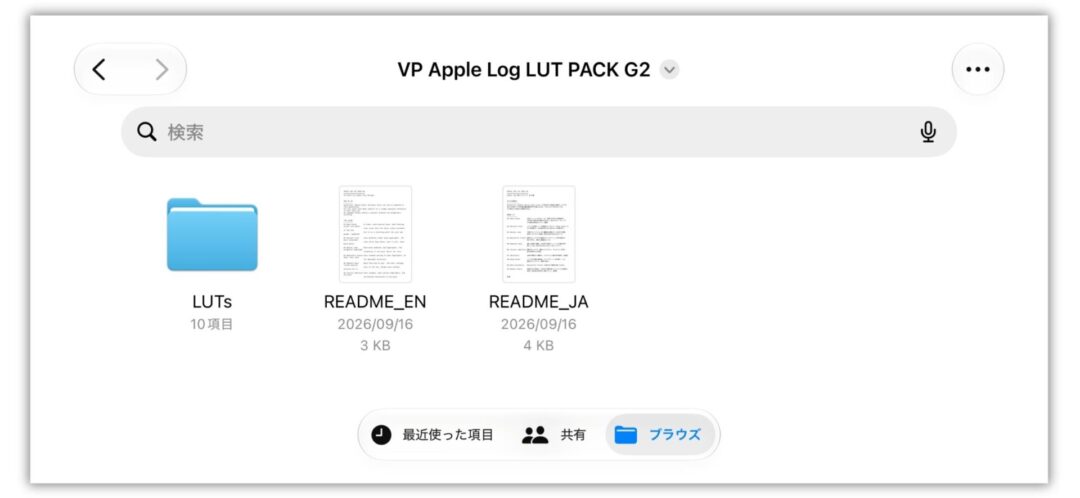
①Download the LUT from Visual Park
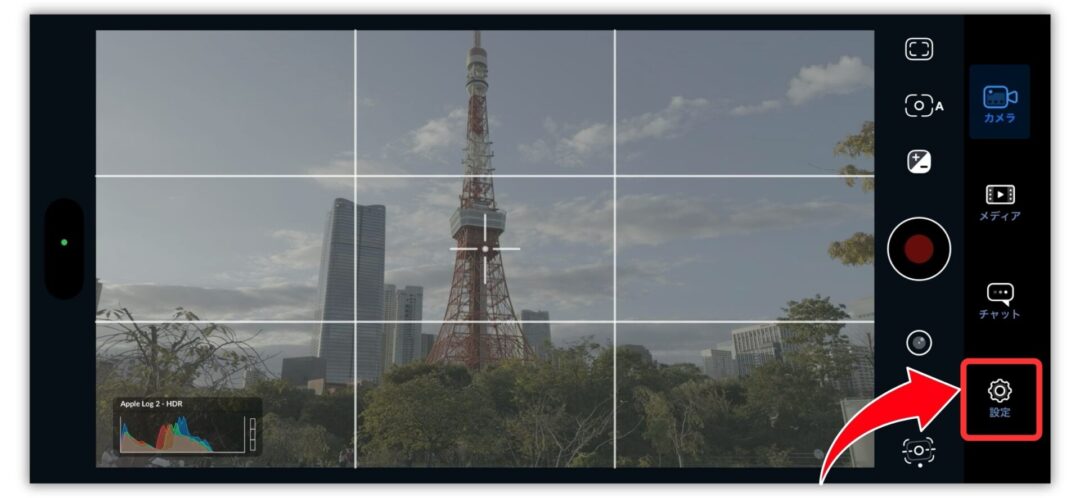
② Open the Blackmagic Camera app and tap Settings
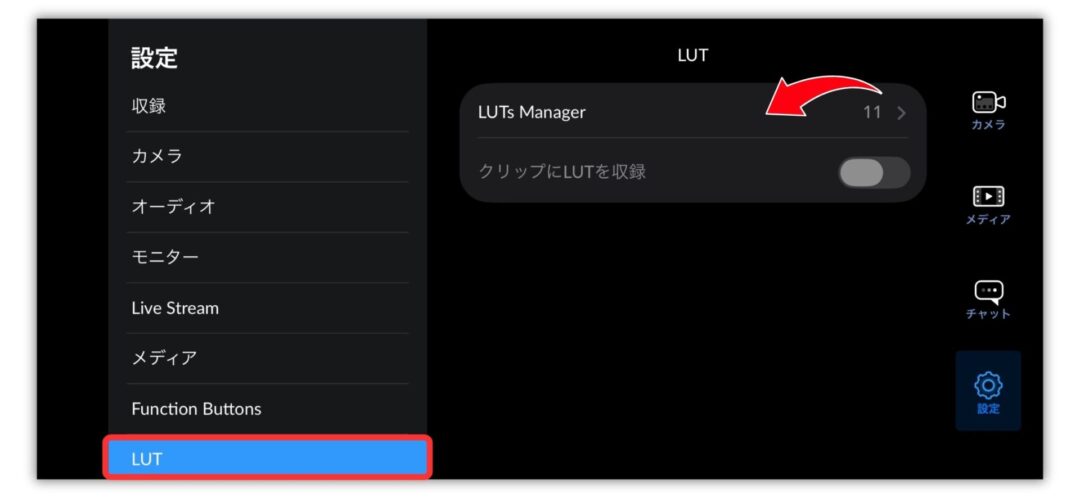
③ Tap “LUT” → “LUTs Manager”
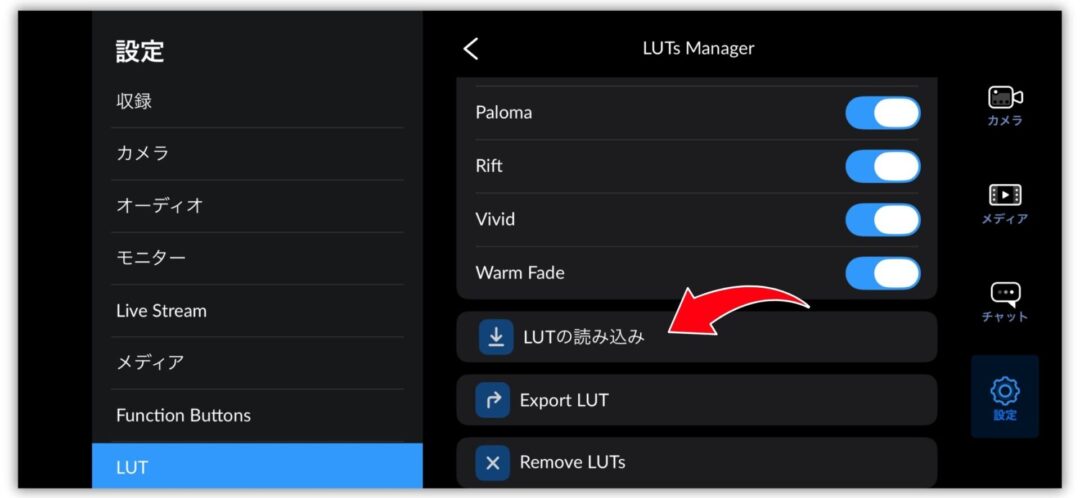
④ Scroll down and tap “Import LUT”
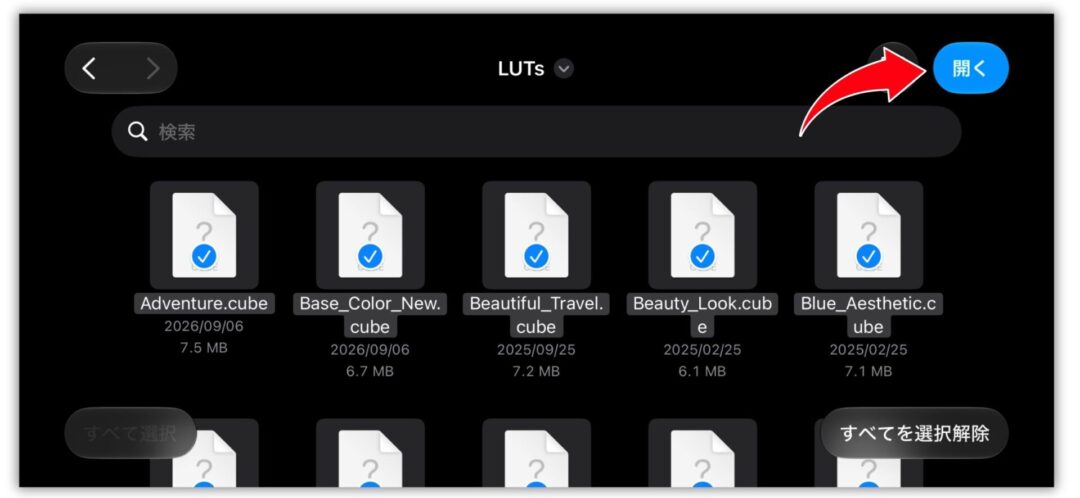
④ Select every LUT from the downloaded files → “Open”
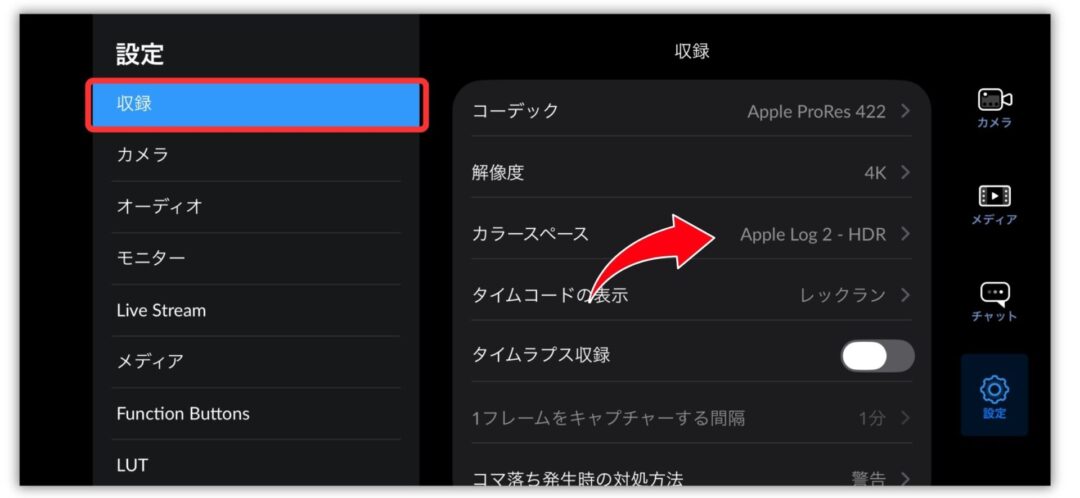
⑤ Go back to Settings and tap “Record” → “Color Space”
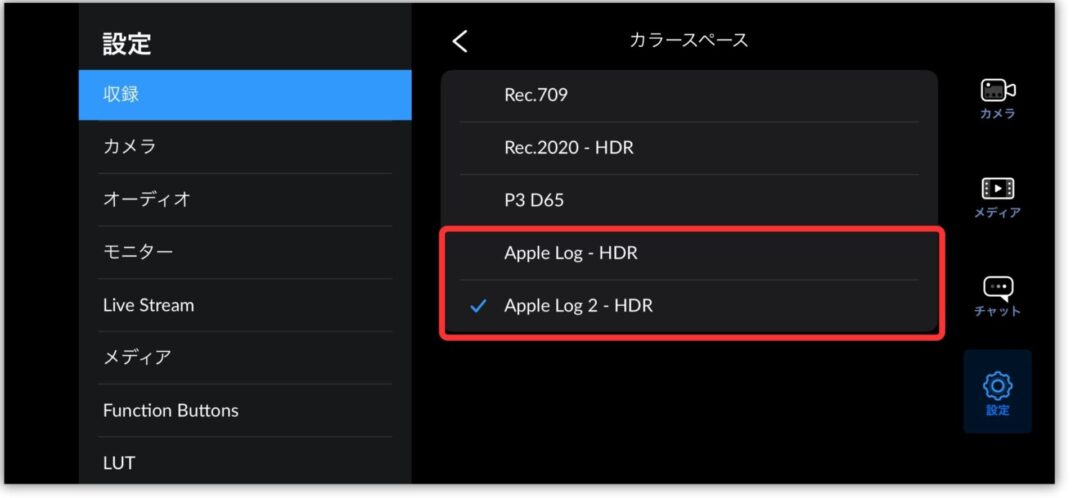
⑥ Choose “Apple Log -HDR ” or “Apple Log -HDR 2 ”
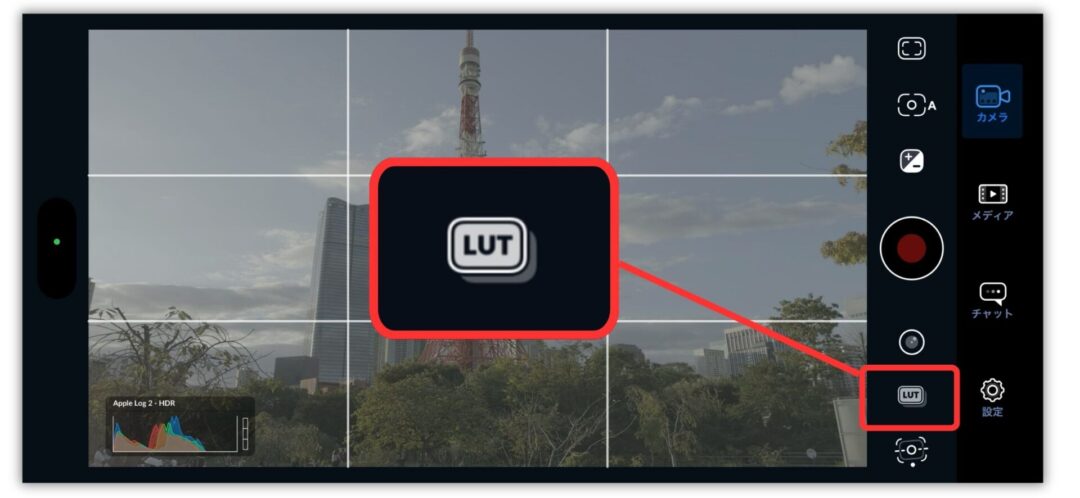
⑦ Return to the shooting screen and tap the LUT icon
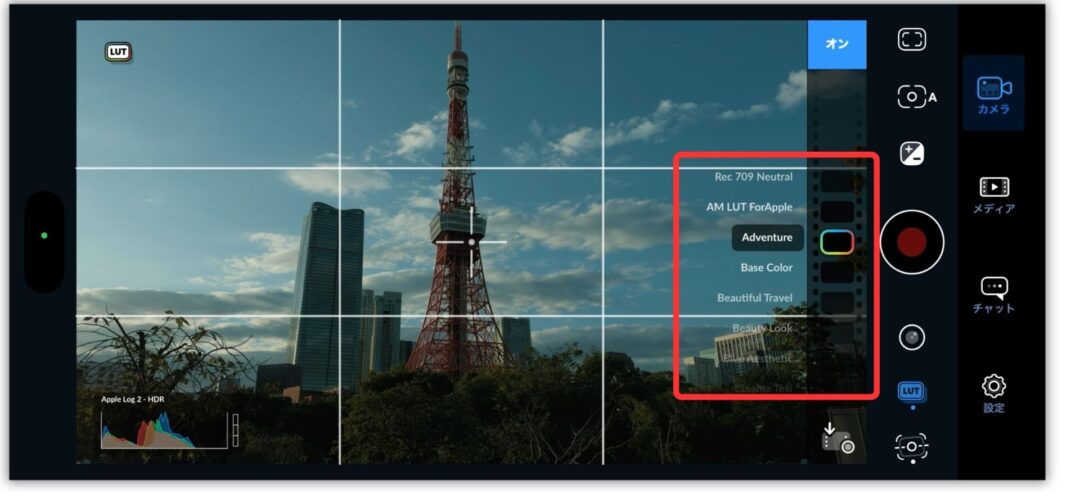
⑧ Scroll to apply whichever LUT you like
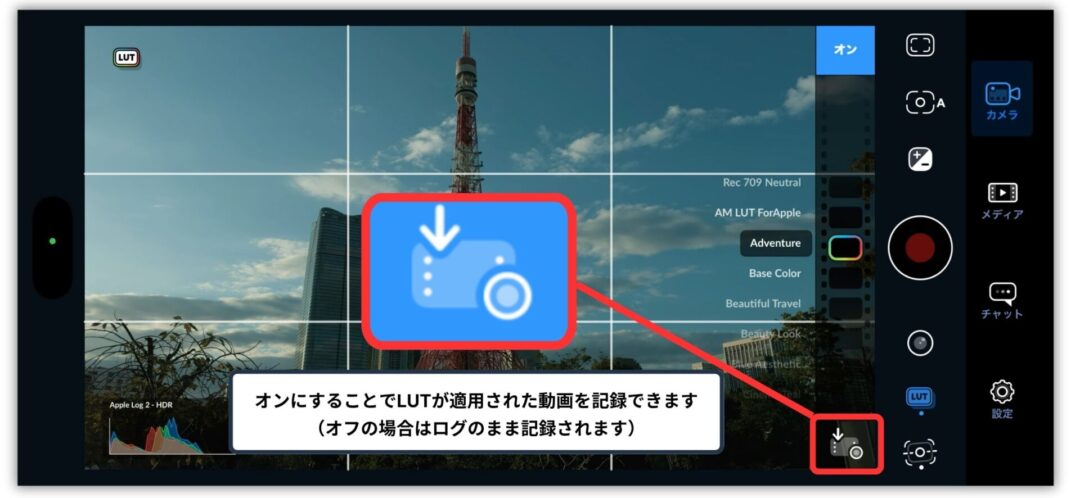
⑧ Tap the icon at the bottom right to start recording with the LUT applied
2. Using LUTs in DaVinci Resolve
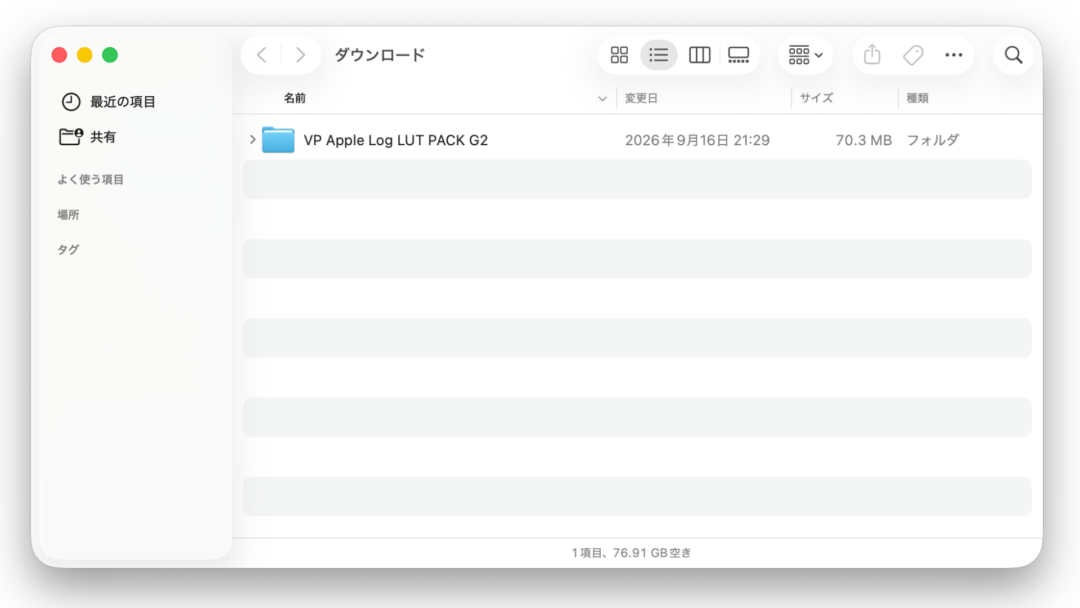
①Download the LUT from Visual Park
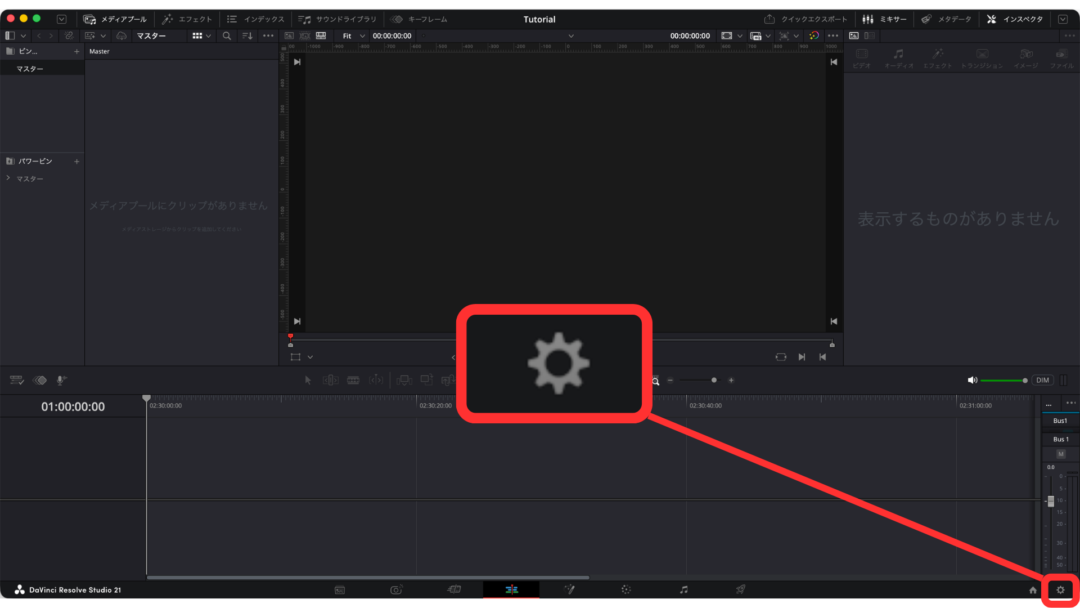
② Click the gear icon at the bottom right of the project window
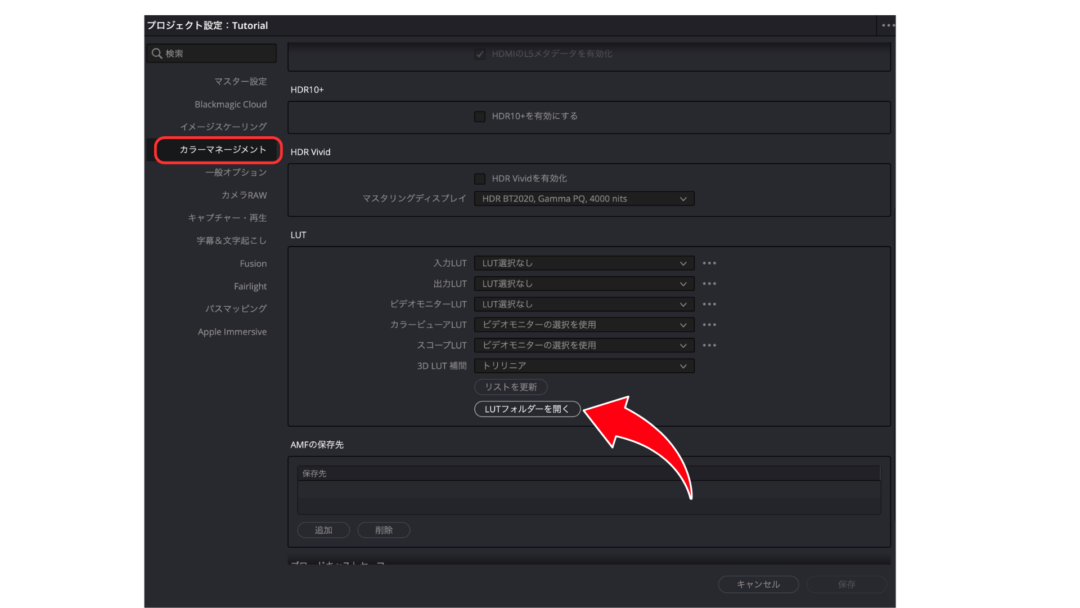
③ Under “Color Management”, click “Open LUT Folder”
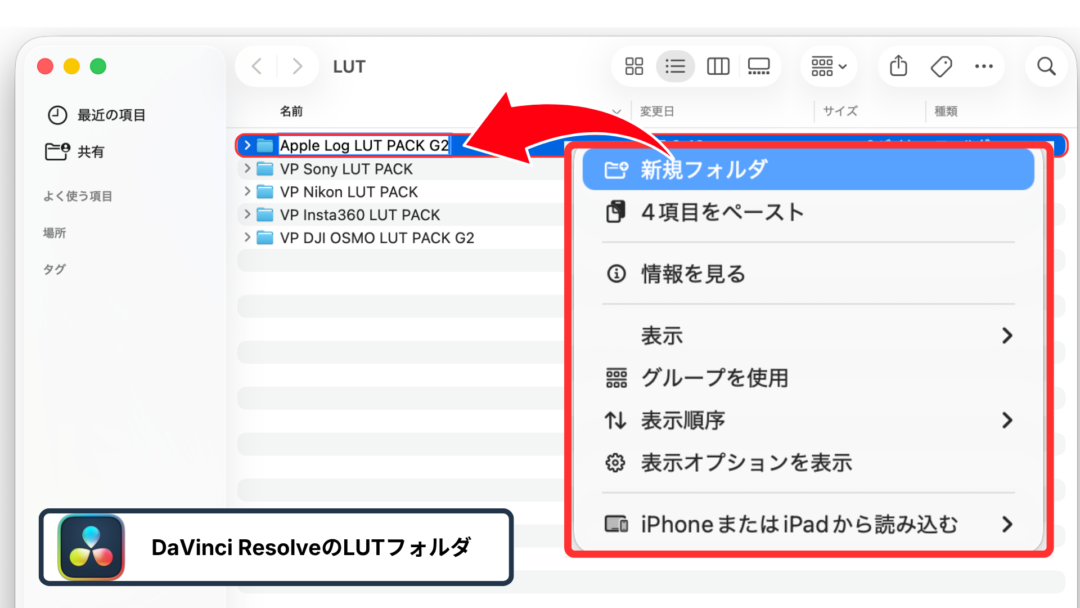
④ In the “LUT” folder that opens, create a new folder with any name you like
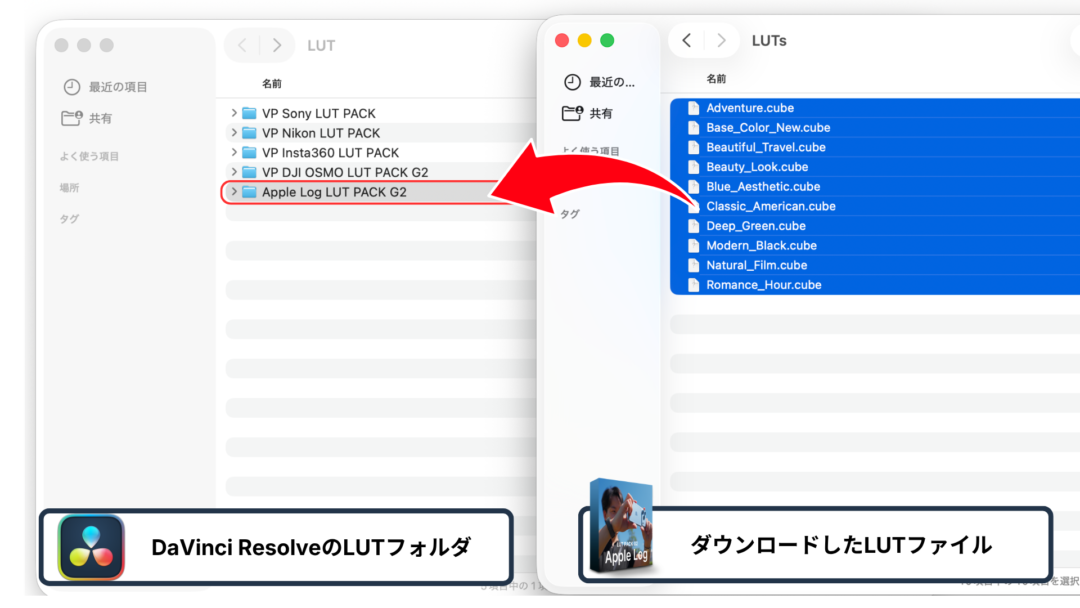
⑤ Copy every file inside the downloaded “LUTs” folder into the folder you just made
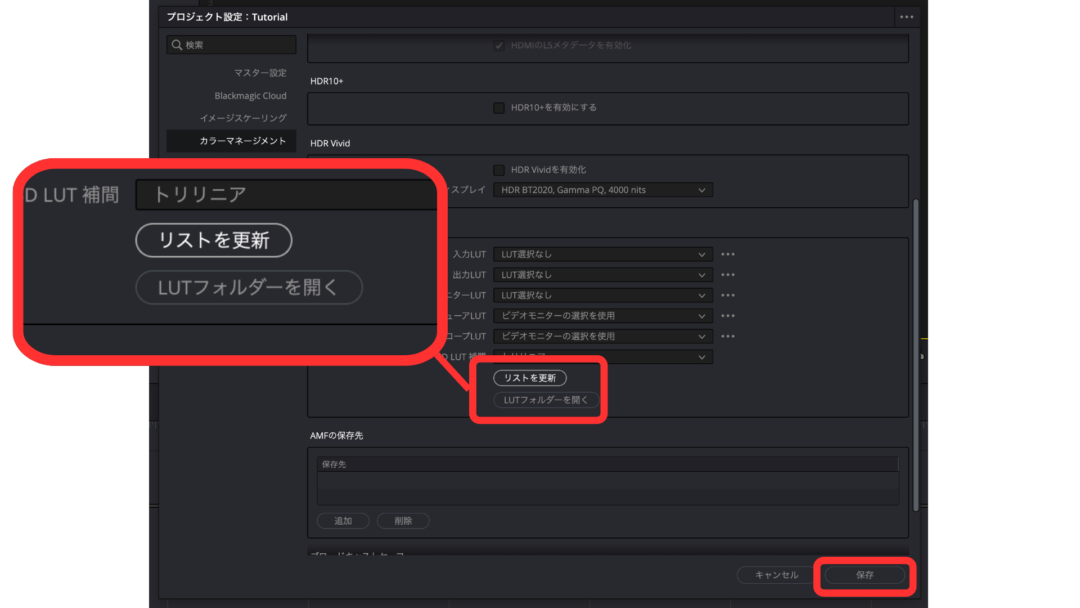
⑥ Click “Update Lists”, then “Save” at the bottom right to finish importing
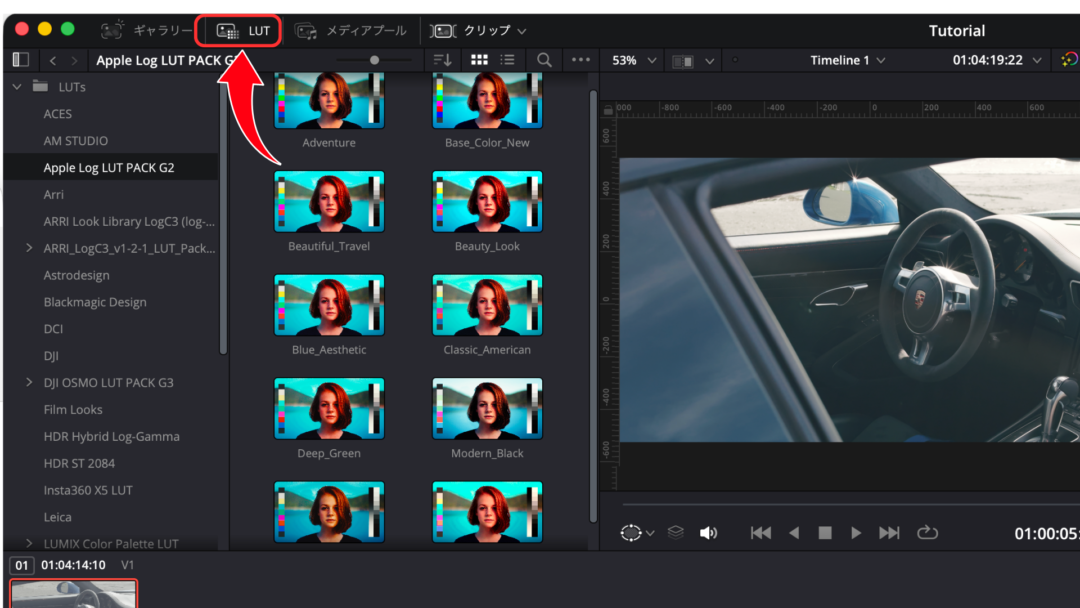
⑦ Go to the Color page and open “LUT” at the top left
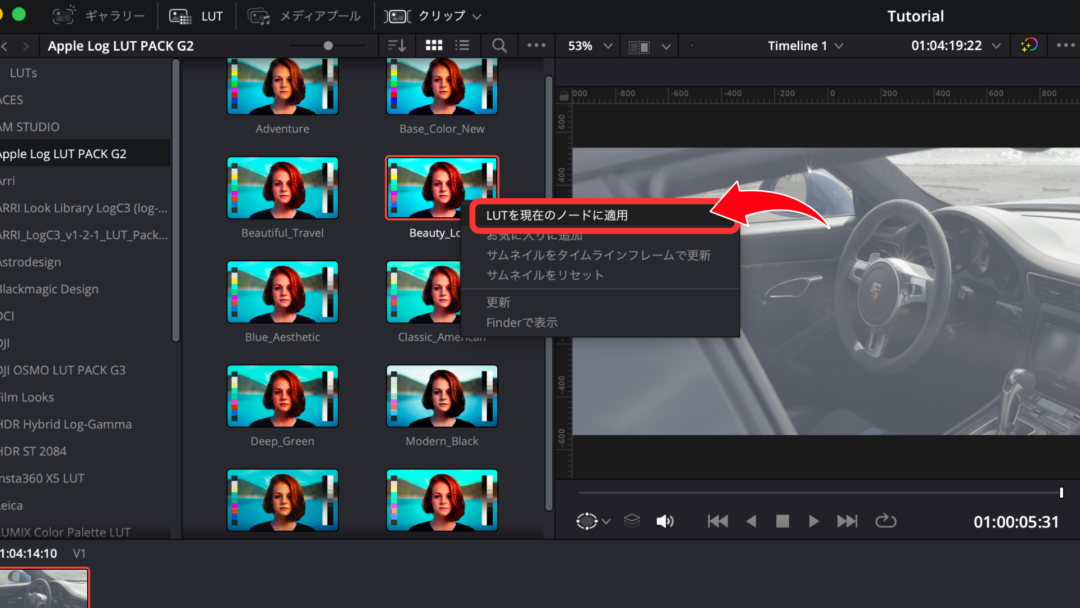
⑦ Right-click the LUT and choose “Apply LUT to Current Node”
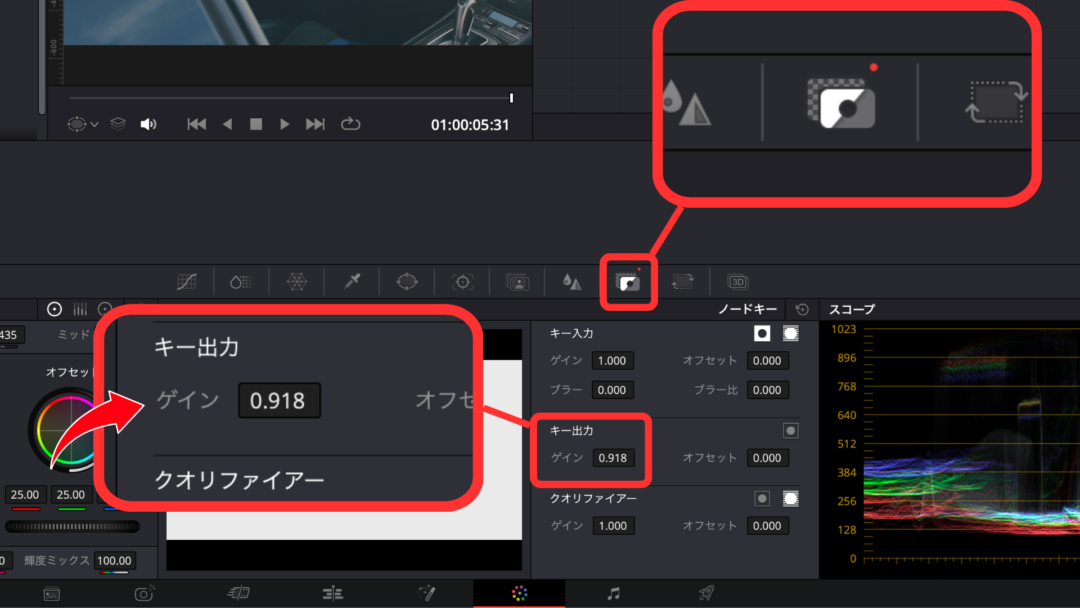
⑧ If needed, adjust the LUT amount under “Key Output”
4. Premiere Pro
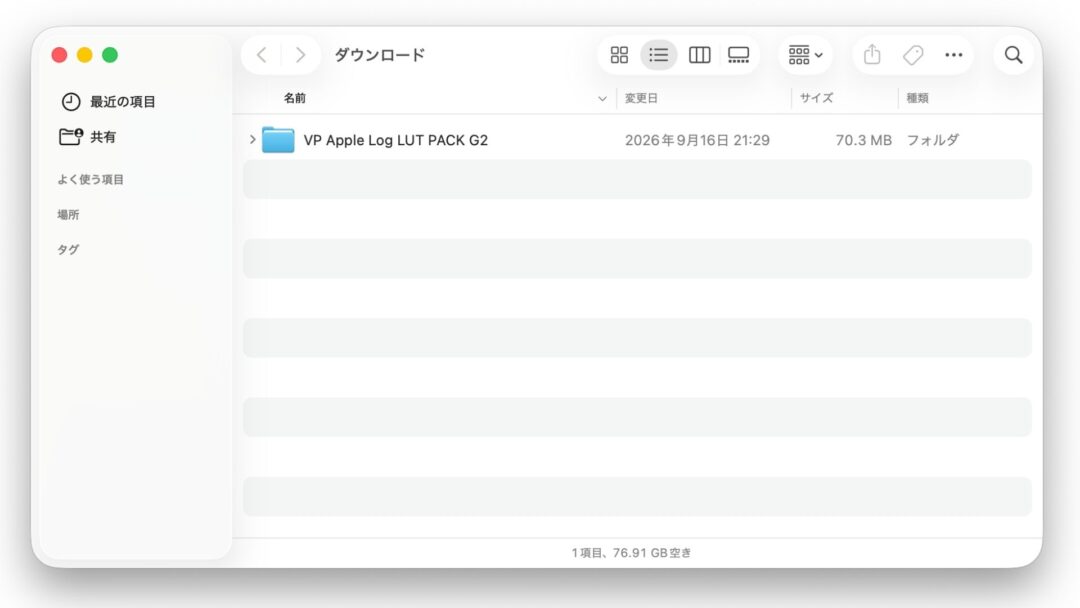
①Download the LUT from Visual Park
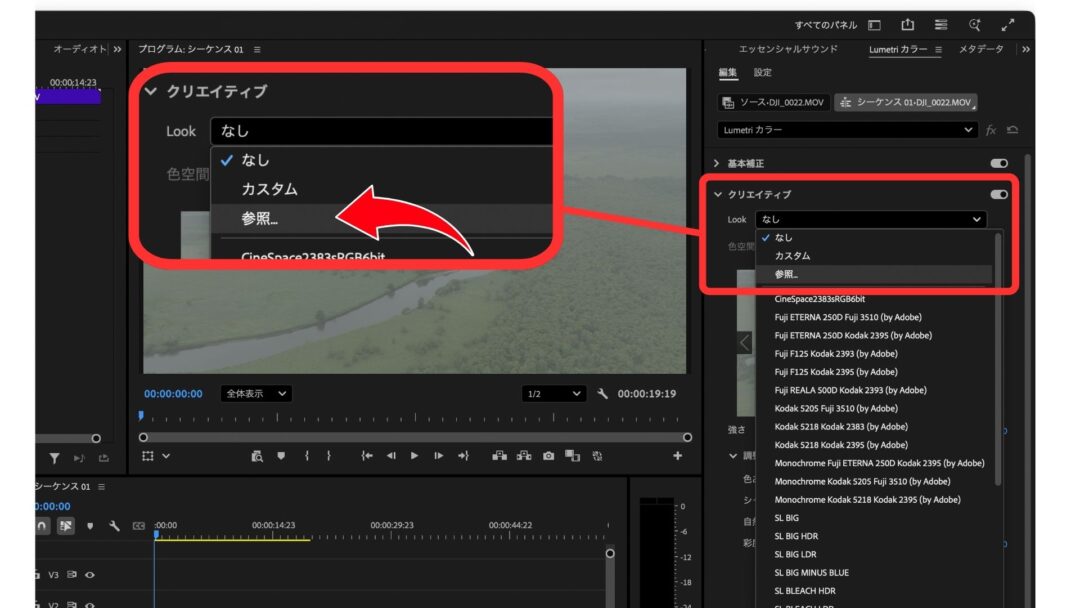
② In Lumetri Color → Creative, click “Look” → “Browse”
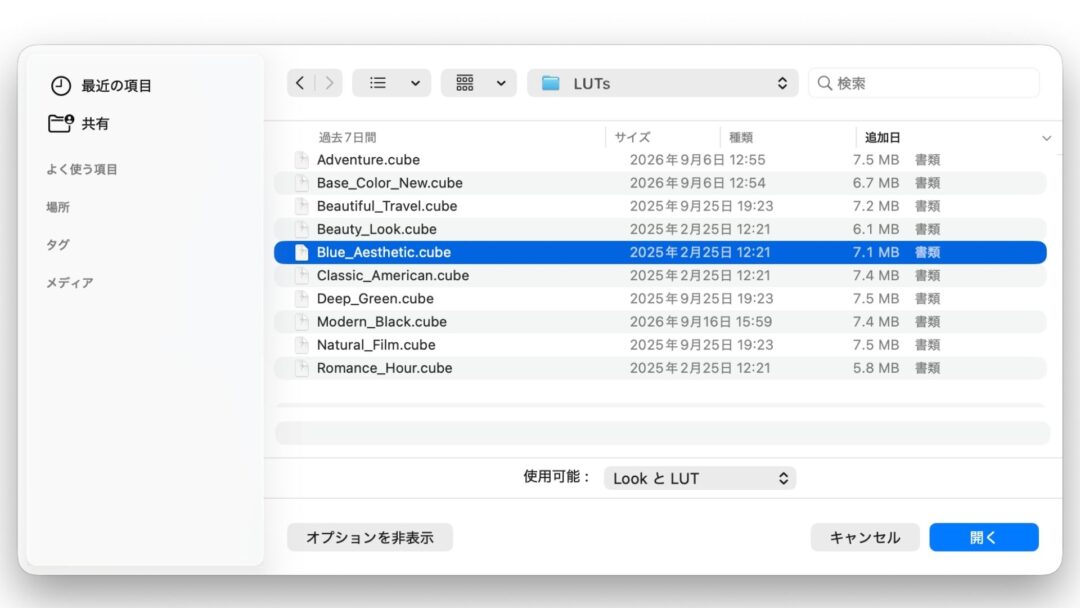
③ Open the LUT you want from the folder you downloaded
④ Adjust the LUT amount as needed
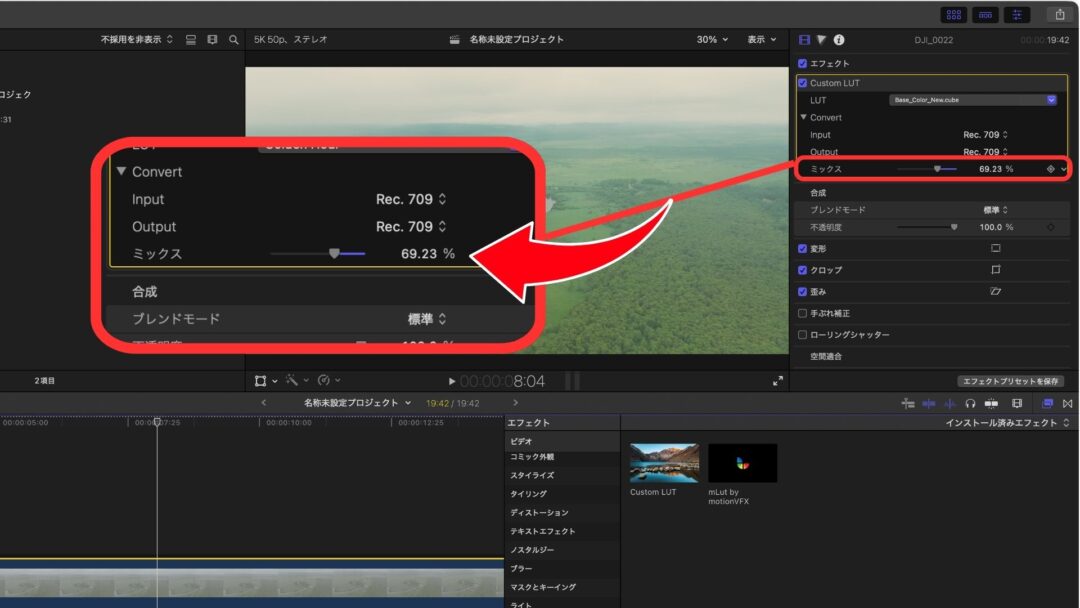
5. Final Cut Pro
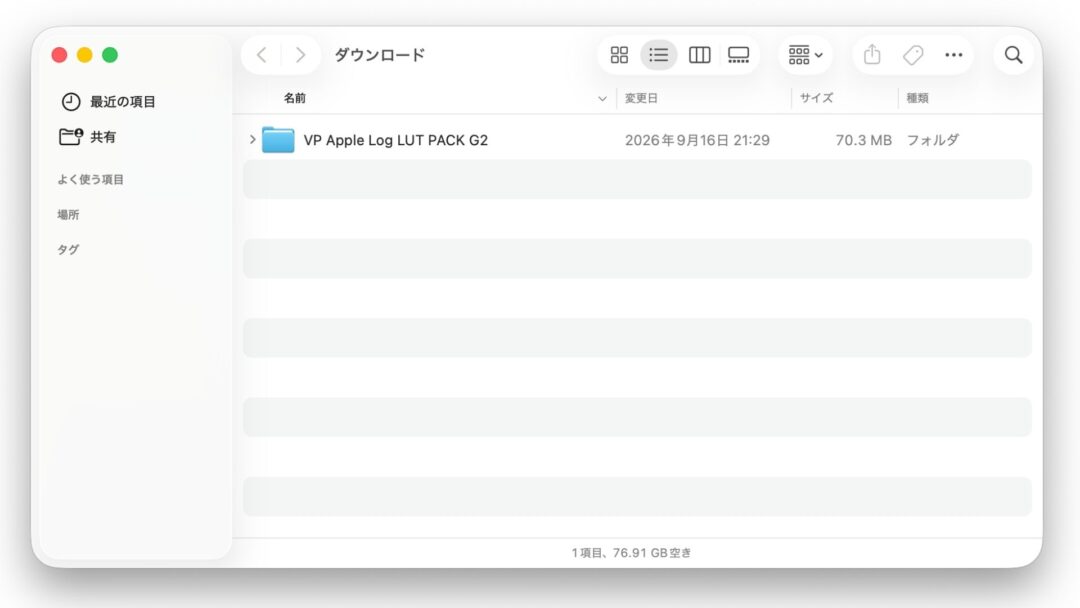
①Download the LUT from Visual Park
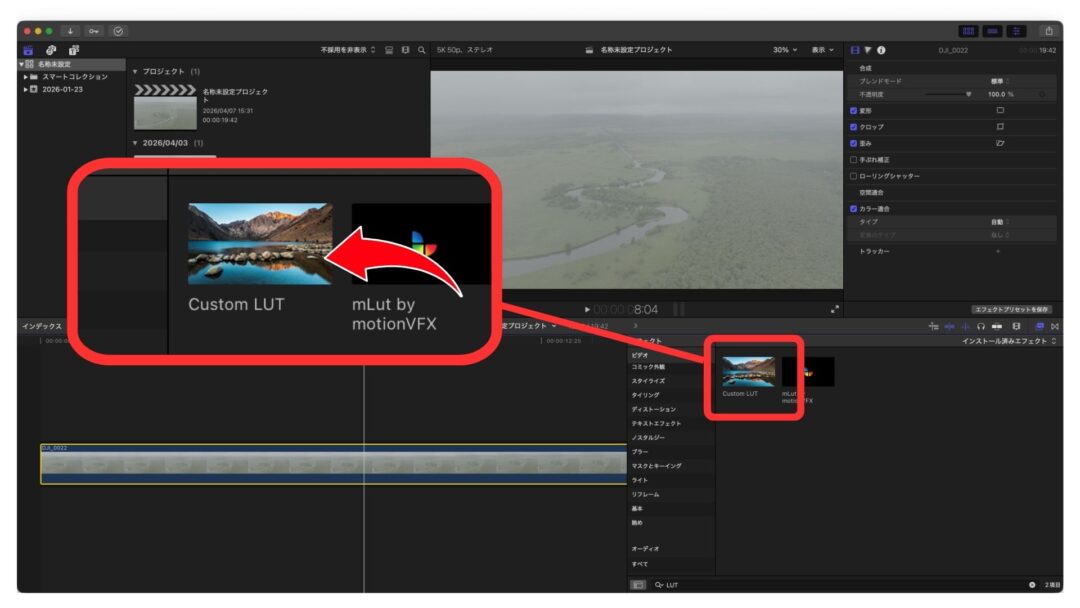
② Select “Custom LUT” from Effects
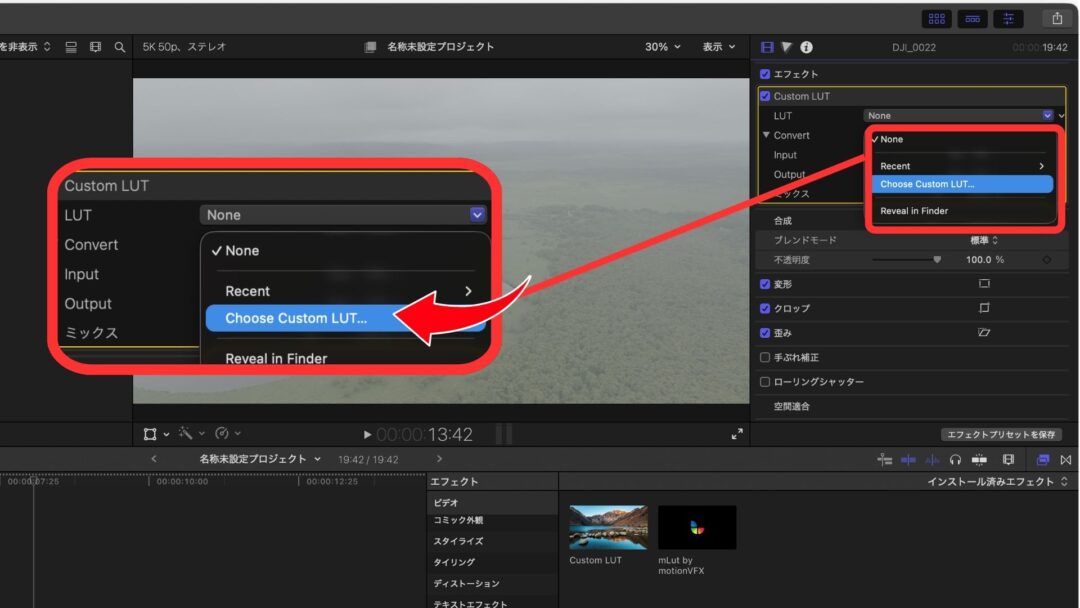
③ Under Custom LUT at the top right, click “Choose Custom LUT”
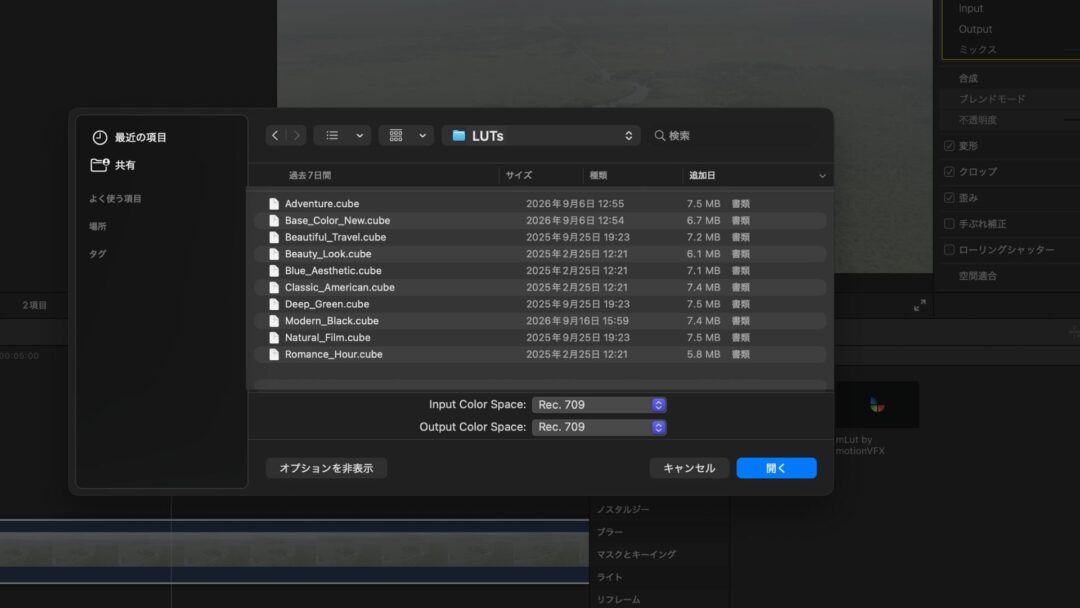
④ Open the LUT you want from the folder you downloaded
⑤Adjust the LUT amount as needed