Apple ProRAW Preset Pack Installation Guide | Lightroom and Lightroom Classic
This guide explains how to import and apply the photo presets included in Visual Park’s «Apple ProRAW Preset Pack» into Lightroom.
The video LUT preset «Apple Log LUT PACK G2 » has its own installation guide.
[Apple Log LUT PACK G2 Installation Guide | Blackmagic Camera App and Other Editing Software]
1. Installing in Lightroom (Mobile)
① Download the presets from Visual Park
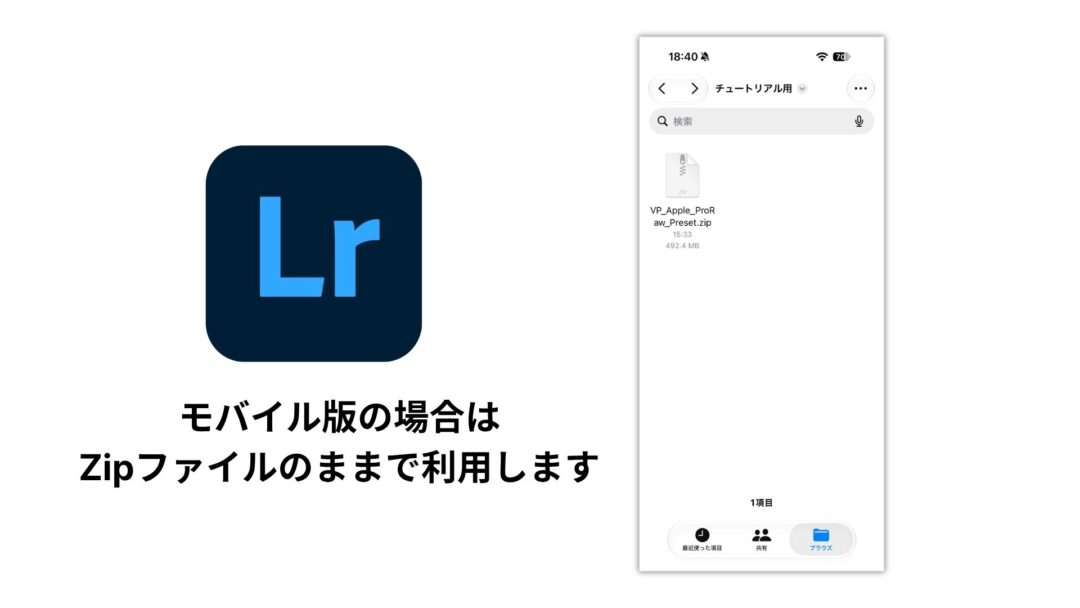
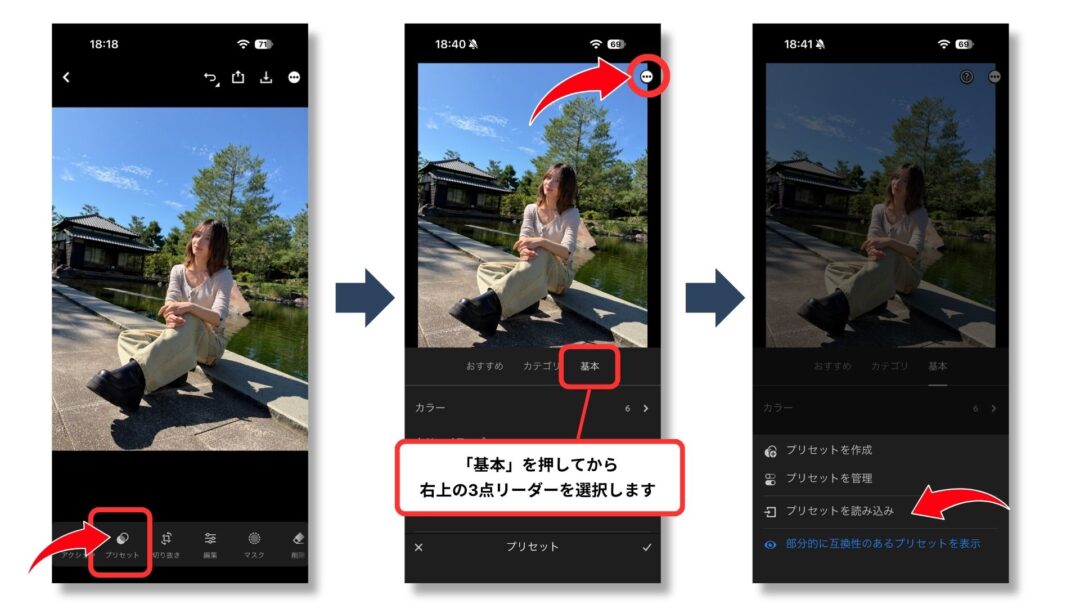
② Open a photo and choose “Import Presets”
Presets → Basic → three-dot menu at the top right → “Import Presets”
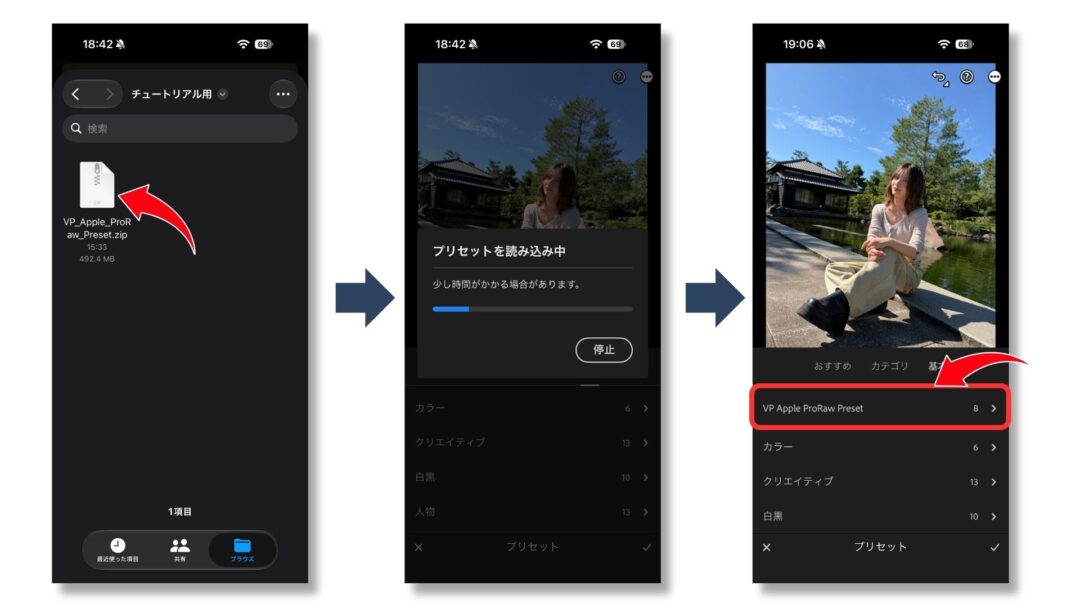
③ Select the .zip file to import it into Lightroom
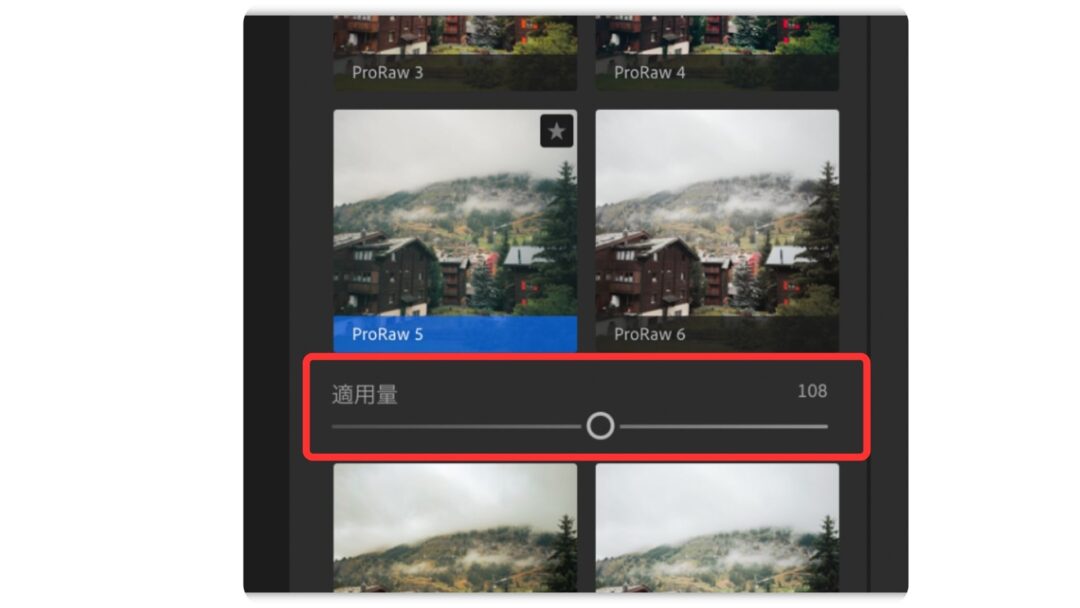
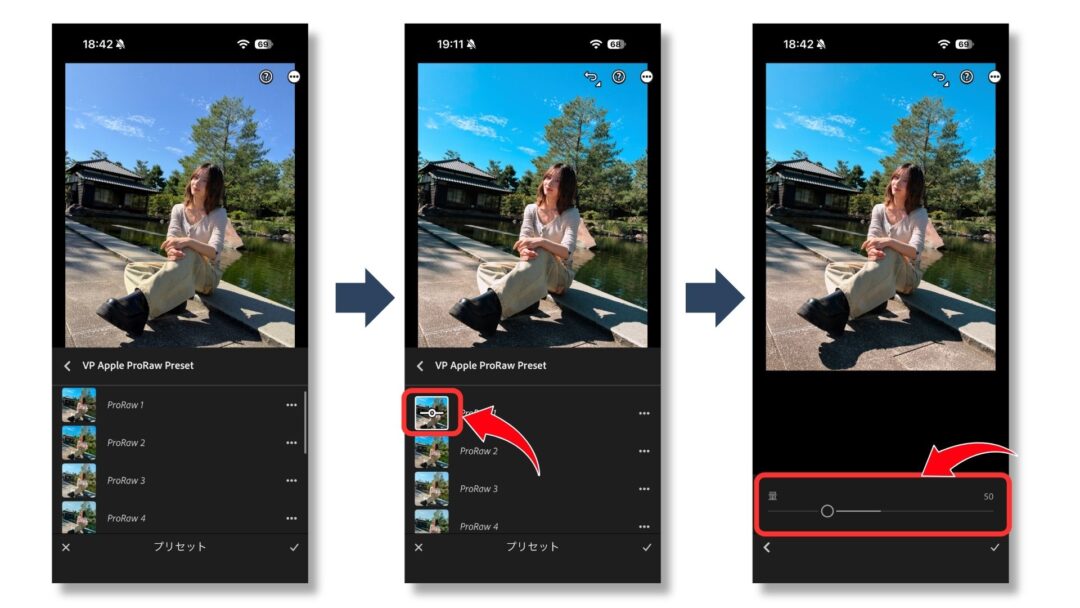
④ Apply the preset and adjust the amount if needed
2. Installing in Lightroom (Desktop)
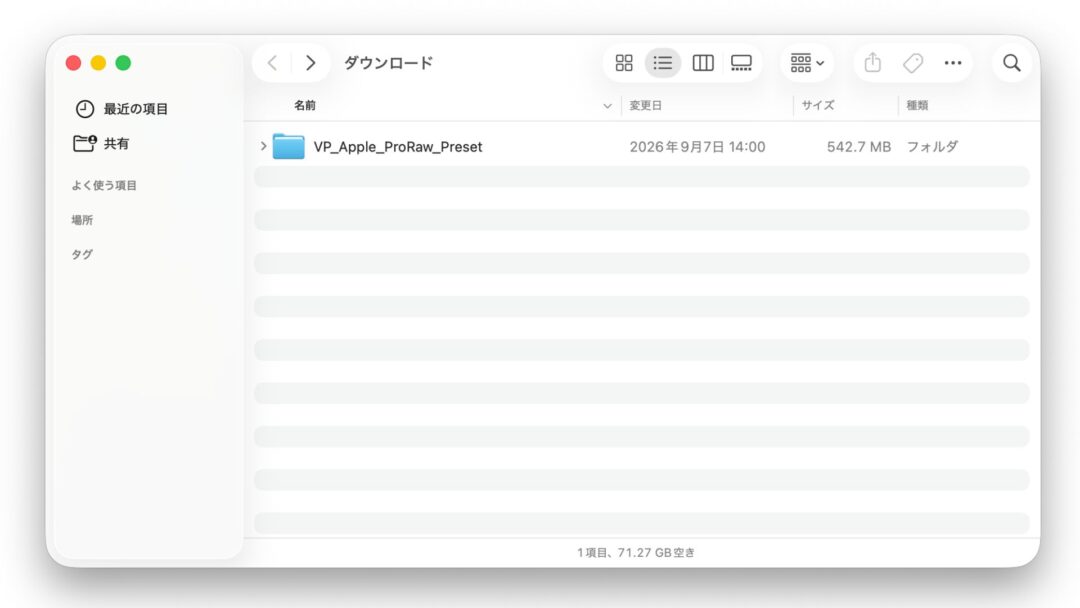
① Download the presets from Visual Park
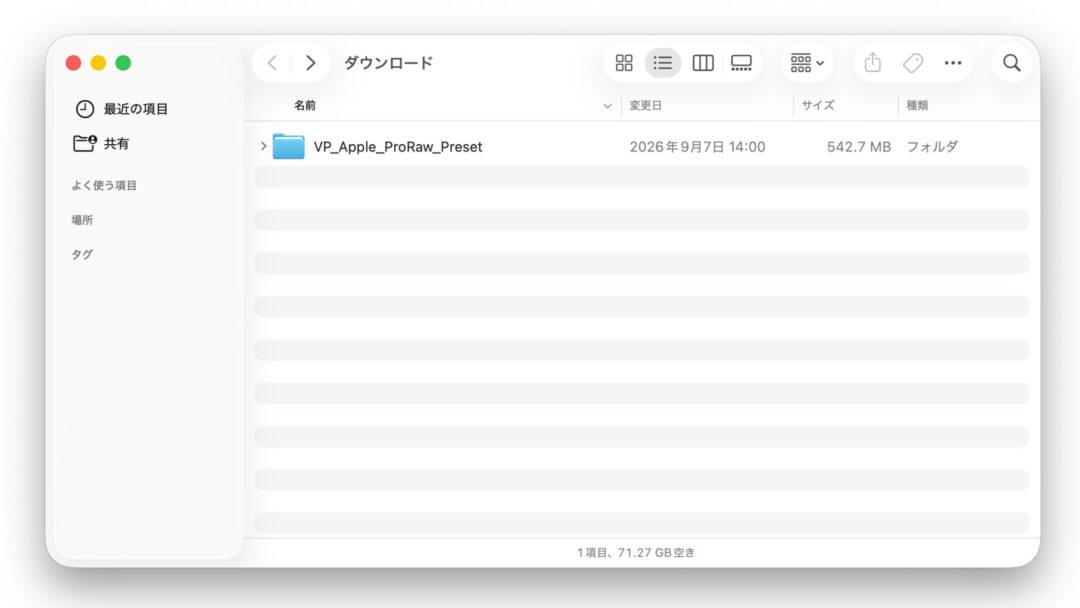
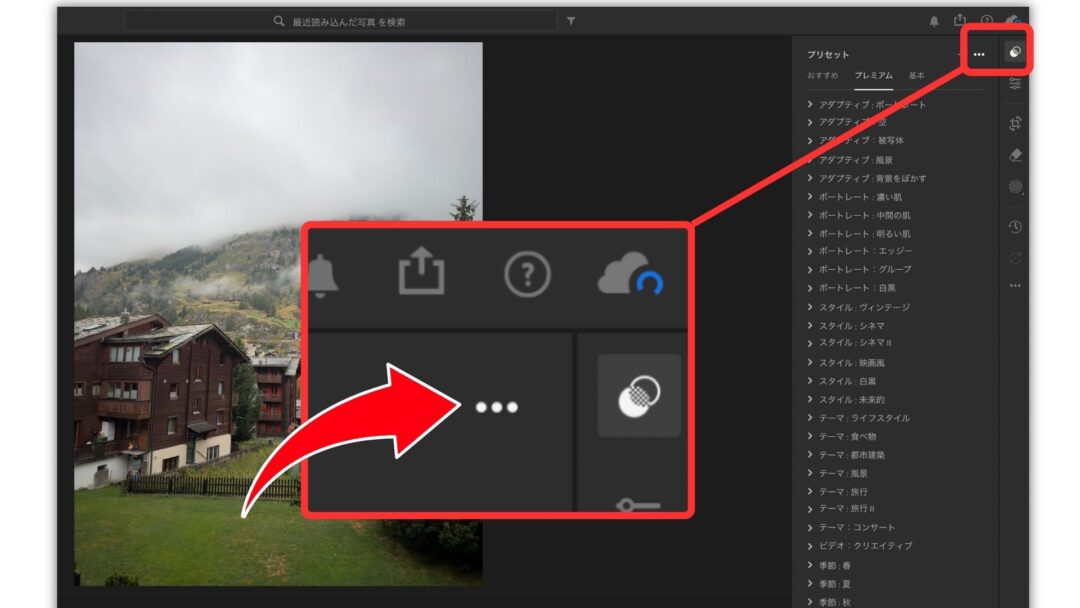
② Open a photo and click the three-dot menu at the top right of the Presets panel
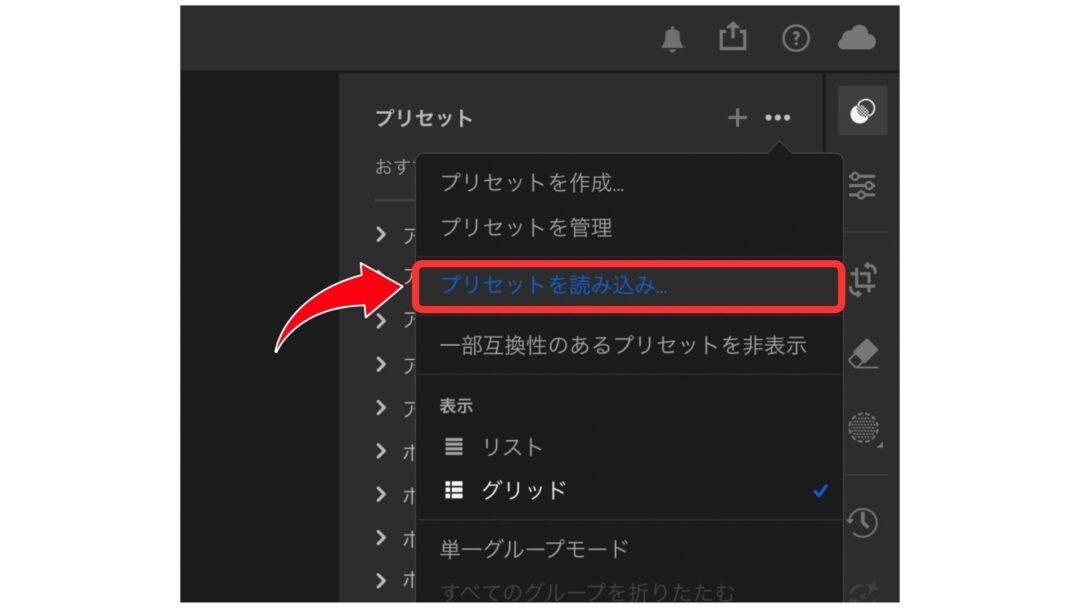
③ Choose “Import Presets”
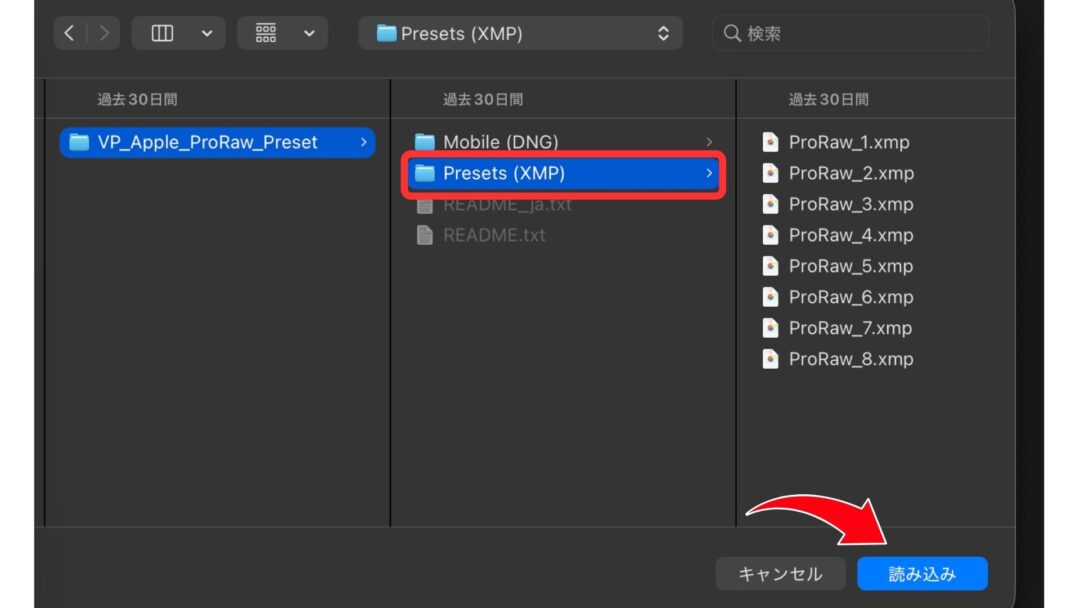
④ Select the “Presets (XMP)” folder and choose “Import”
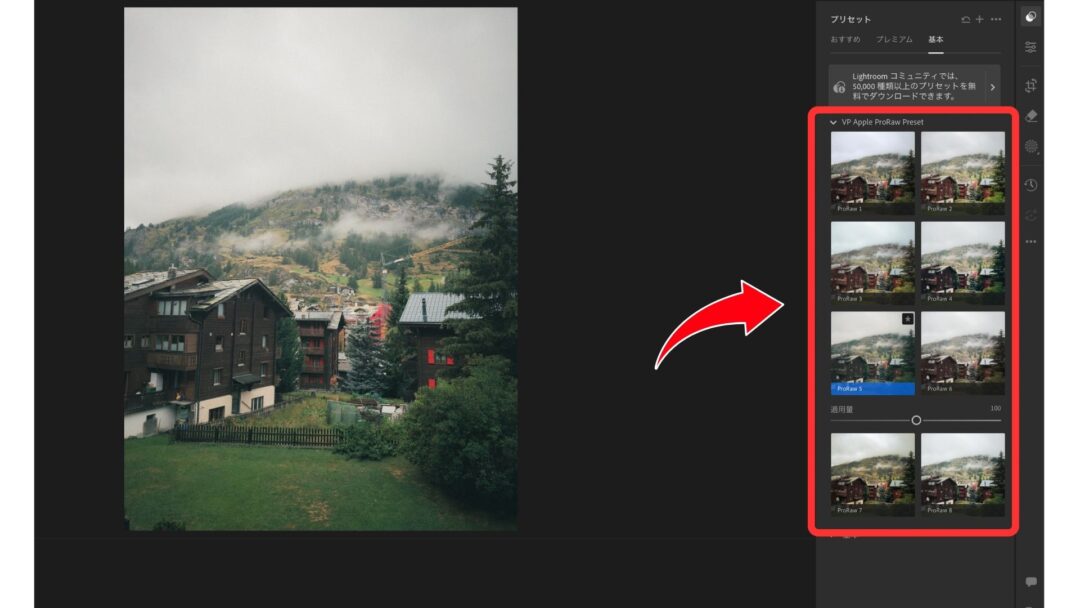
④ The presets are imported and ready to apply
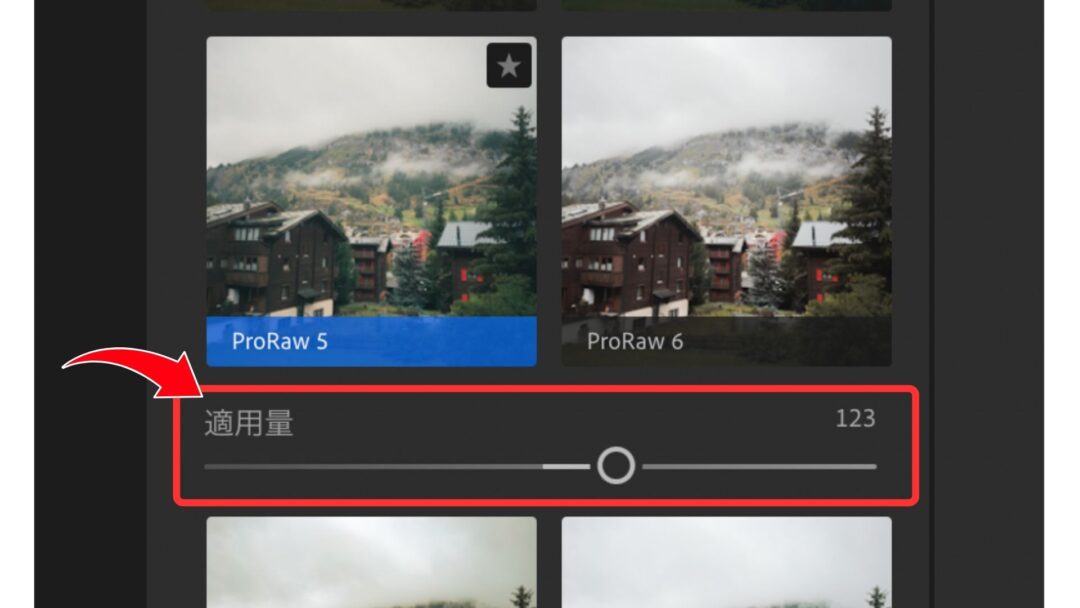
⑥ Adjust the amount as needed
2. Installing in Lightroom Classic
① Download the presets from Visual Park
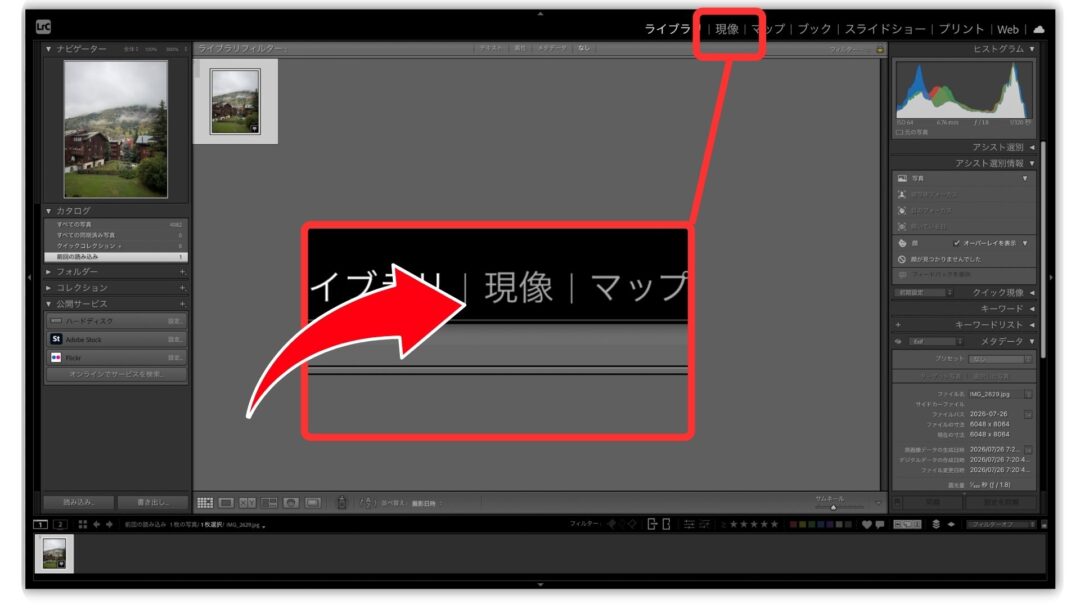
② Import your photo and go to the Develop module
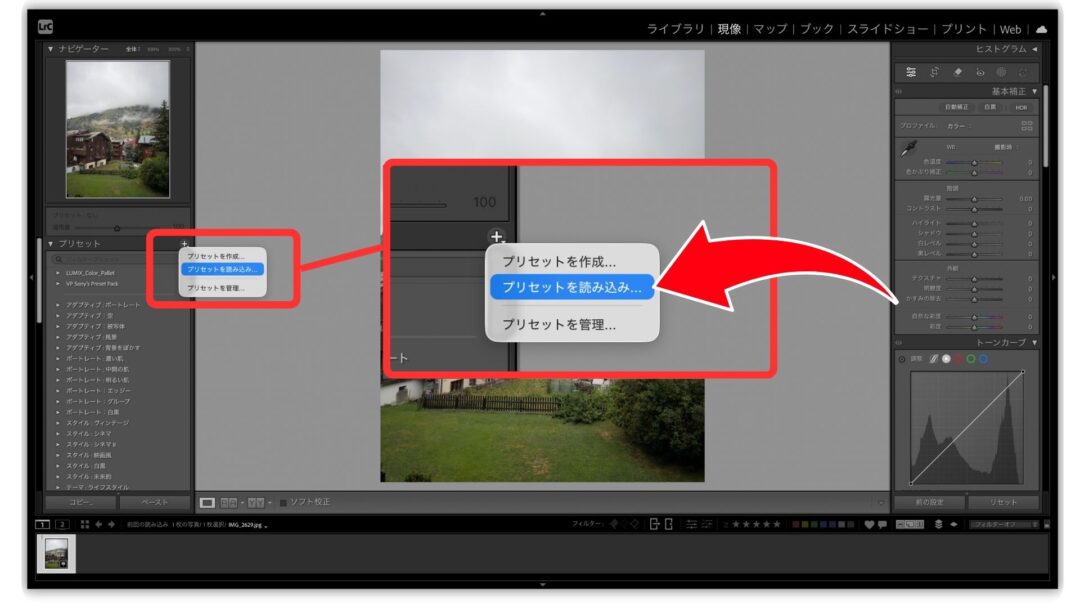
③ Select “+” in the Presets panel → choose “Import Presets”
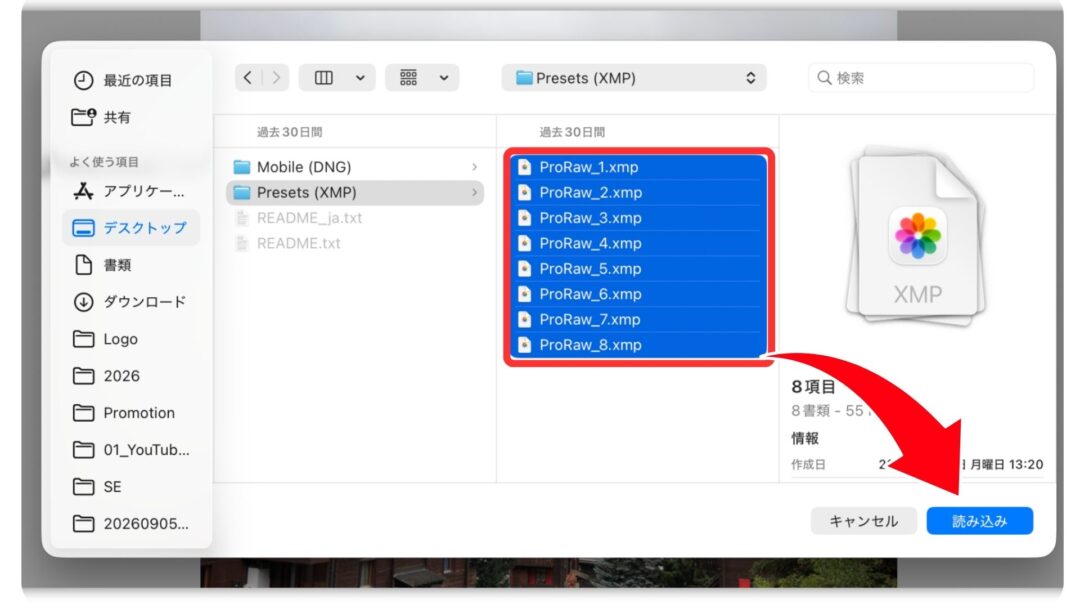
④Select every file inside “Presets (XMP)” and choose “Import”
④ Pick the preset you want
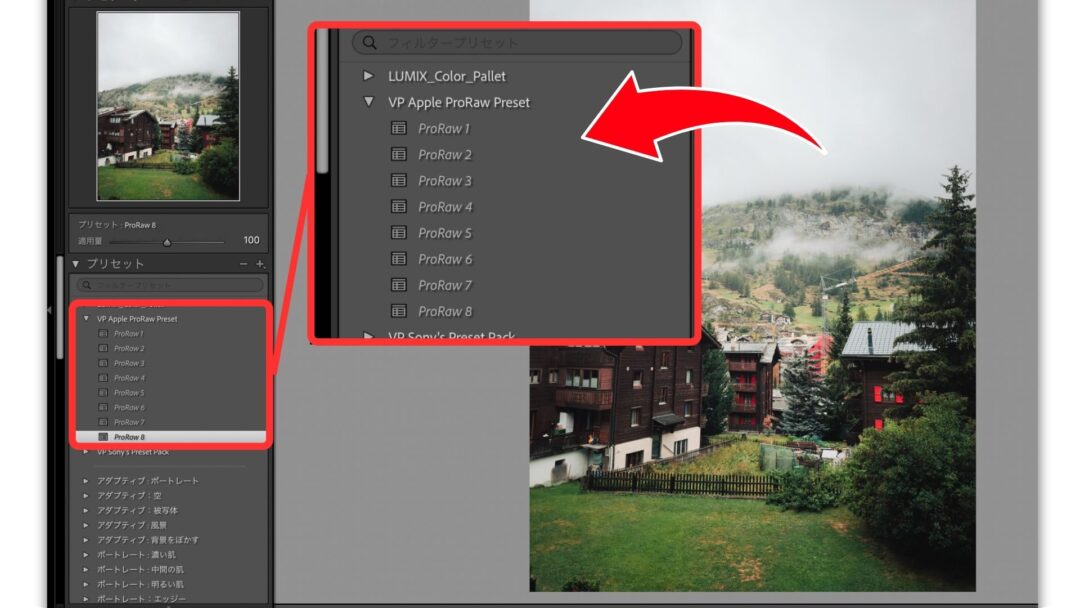
⑥ Adjust the amount as needed